Search This Blog

Showing posts with label side. Show all posts

Sunday, July 24, 2011

For The Love Of Quinoa....

My husband recently had a conversation with someone who was finding it a struggle to go gluten free. He suggested quinoa, and got a wrinkled nose and "Yuck." My husband thought it was funny because he really enjoys quinoa, but we both forget it was a love we had to develop over time. Quinoa has a distinctive flavor that I've heard described as nutty or "healthy." I'll admit that the first few times I tried it, I wasn't its biggest fan. That changed as I learned some great ways to prepare quinoa and how amazing the grain is.

Quinoa is actually a small berry rather than a grain. It is in the psuedocereal family, a grain mimicker. I say all the better because this "grain" is jam packed with amino acids and lysine. When combined with a lower lysine grain like rice, sorghum, or millet, you have a protein that is more complete than animal proteins out there, but easier to digest. We use quinoa in a large variety of ways - hoe cakes, flat bread, sides, vegan burgers (recipe follows), and salads are a few. I generally recommend using this grain in savory dishes as opposed to desserts.

Easy Quinoa
1 cup Quinoa
2 cups Water
1/2 lemon, juice
1/3 tsp salt or to taste
pepper to taste
fresh chopped herbs like chives, oregano, thyme, etc.
garlic powder to taste (optional)

Soak the quinoa in water for 20 minutes, and then use a fine sieve to drain the water and rinse. Add 2 cups of water and salt, and bring the quinoa to a boil. Turn the heat down a bit and cook until the water is absorbed. Use a fork to fluff the quinoa up, much like you would couscous, and add the lemon juice, pepper, and fresh herbs. Serve with salads, main dishes, and more. The lemon helps lighten the flavor. My 2 year old nephew approves, and this was one of the first ways I made quinoa and enjoyed it.


I picked up the Veggie Burgers Every Which Way book during a going out of business sale at a book shop. At first I was slightly disappointed at how many of the yummiest looking burgers were lacto-ovo vegetarian instead of vegan, but then I snapped out of it and realized I could use my newest technique to vegan-ize them!

I have started using yamaimo, or Japanese Mountain Yam, as an egg replacer in several dishes. Yamaimo is a little hard to get a hold of, but if you have an Asian grocery market in your area, you may be in luck. These tubers grow as long as 3 feet, and have a really peculiar trait. Once they are cut open, you can feel SLIME on the surface of the flesh. When a yamaimo is shredded, it has the slimy texture of a raw egg. If you can get past the texture issue, it is a great binder and it is used in Chinese medicine as a healing agent for the stomach and intestines.
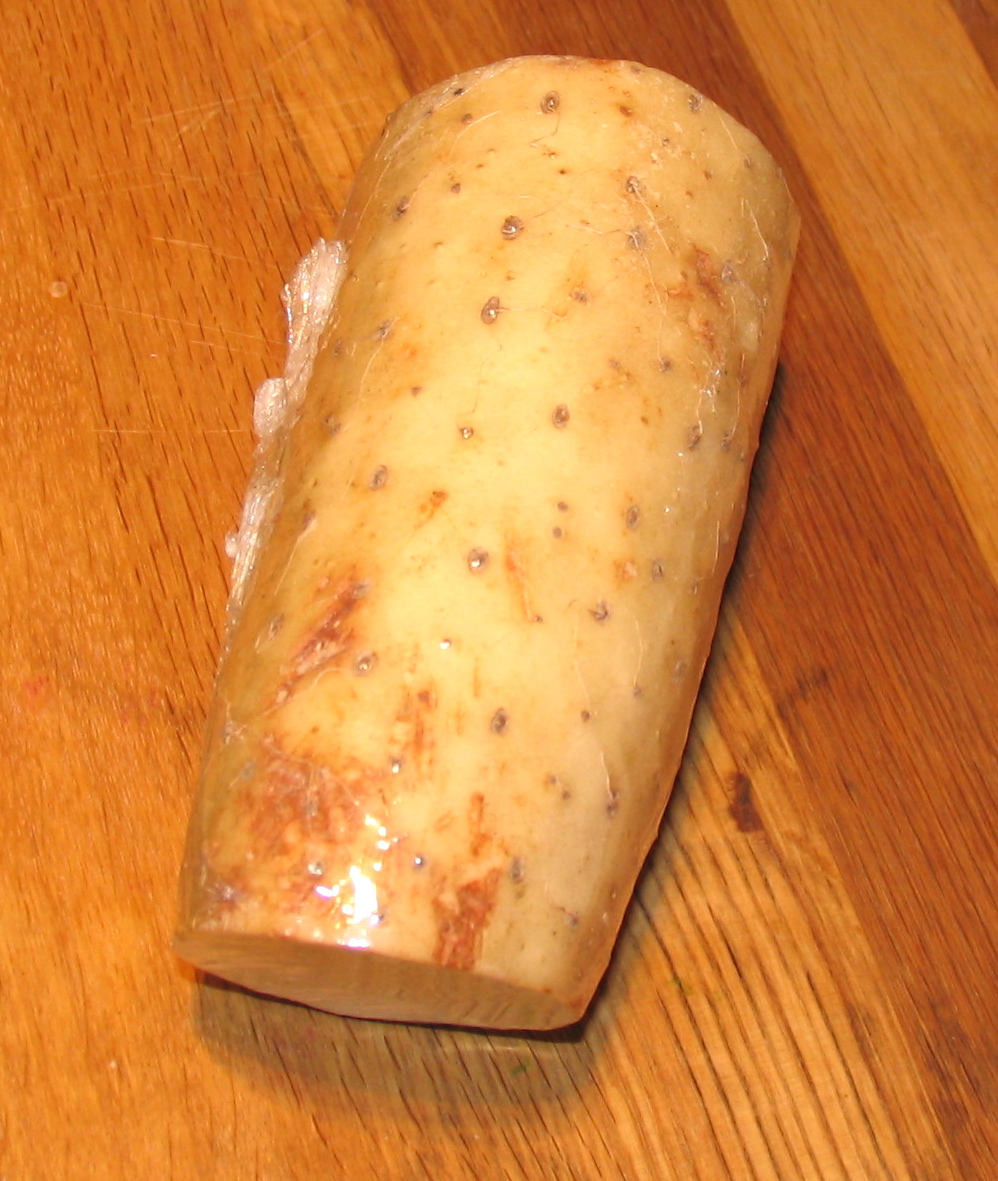
Yamaimo with plastic wrap around the exterior so it doesn't
leave a gooey puddle in my fridge

Yamaimo grated - you can still see the grated pieces because I used a normal
sized grater, but there is also a pool of slimy liquid.

If you look closely, you can see a slime bubble on the surface of the
whole piece of yamaimo.


Quinoa Burgers (Adapted from Veggie Burgers Every Which Way)
1 cup quinoa
3/4 cup blanched turnip greens
1/4 cup yamaimo, grated
1/4-1/2 cup finely minced red onion (I love me some onions)
1/2 lemon juiced
3 TB All purpose gluten free flour
1 tsp Hain* baking powder
1 tsp salt
1/4 tsp cayenne pepper

Soak the quinoa for 20 minutes and then rinse. Add a cup and a half of water to sauce pan and cook the quinoa. Preheat the oven to 400 degrees. Blanch turnip greens in boiling water for less than 60 seconds and put in an ice bath so they stay a vibrant green (this stops the cooking process). After the greens are cool, squeeze the water out. Put the quinoa, greens, yamaimo, gluten free flour, onion, lemon juice, baking powder, salt, and cayenne pepper in a mixing bowl and combine. Form patties on a baking sheet lined with baking paper and bake for 25-30 minutes in the oven.

I boil the turnips and serve along side the burgers with a kohlrabi apple slaw with a macadamia mustard sauce. We brought the burgers to a potluck today and people seemed to like them.


Wednesday, June 22, 2011

Savory Hoecakes and Garlic Rosemary Potatoes

This weekend, we had my mom, brothers, and nephew come over for dinner. I try to have them all over at least once a month. Owen (nephew) has some serious food allergies, and he's getting to that age when he is noticing what other people are eating and he wants the same food! It's amazing how young people are when they start to feel the need to fit in and be like others. I love providing a large meal that is entirely Owen friendly.

Enjoying some savory hoecakes and straight up ketchup. Blech.

We had a large spread of fruit, veggies, savory hoecakes, garlic rosemary potatoes, non-vegan friendly items for the family members who partake, and cupcakes for dessert. The favorites were the hoecakes and the cupcakes. The hoecakes nearly didn't make it to the table, and the few leftovers we had were packed up for Owen.

Savory Hoecakes
1 pear, pureed
1/4-1/3 cup (loose packed) garlic spears, sliced
3.5 oz ground quinoa
1 Tb ground chia
3.5 sorghum flour
1 oz tapioca flour
1/2 tsp baking powder
1 1/2 tsp baking soda
1/2 tsp salt
3 T safflower oil
4 oz hemp milk
1 tsp vinegar

The batter responds best when the frying pan is hot and the batter is formed to pancakes no bigger than 2 1/2 inches across. Plenty of oil is needed as well - not to deep fry, but the pan should be amply coated.

Substitutions: Garlic spears are something I recommend folks try if they can. They are in season now, and should be available at farmer's markets. If they are not available in your area, green onions are a perfectly acceptable substitute. Apple (preferably varieties meant for cooking) can replace the pear, but Owen is allergic.

I use a coffee grinder to grind up my quinoa flour, which leaves some texture, like corn meal. I combine the dry ingredients, then the wet ingredients, folding in the garlic spears last. They cook much like a pancake, and are ready to flip when bubbles form at the top and they appear cooked partially on the sides.


Rosemary and Garlic Roasted Potatoes
2 pounds potatoes
3 cloves garlic
2 sprigs rosemary, minced
3 Tb olive oil
salt and pepper to taste

Preheat the oven to 375 degrees. I dice the potatoes in 1/2" or smaller squares, depending on how long I have to cook them. After dicing, the potatoes go in a bowl with olive oil, minced garlic, rosemary and salt and pepper. That all gets thrown into a baking dish and into the oven for about 45 minutes.


It was a tasty meal, and I could tell other folks liked their food because it was pretty quiet. Owen is still at an age where he picks at his food and doesn't seem to eat a whole lot, but he will eat quite a bit of dessert. I made "red" velvet cupcakes with cream "cheese" frosting. I say "red" because I'm having a hard time finding the right natural ingredients to get that amazing red color. I'm beginning to become convinced that red velvet color is only possible with gross artificial coloring, but I'm still toying around with beets.

He may have been imitating a dinosaur here.
Mmmm.....Frosting.

Tuesday, February 1, 2011

Apple Fennel Roast


Our fridge is running really, really low. In my baking frenzy this weekend, I overlooked real food. It ends up being a good thing when I have to consider something new. I haven't had much cooked fennel. I have heard that it goes with apple. I had no idea what spices went with them, so I kept it simple, and my husband and I both liked it. I think it would go really well with some pasta if the pieces are cut smaller or as a side.

Apple Fennel - Pan Roasted
1 large Fennel Bulb
1/2 large Yellow Onion
3-4 cloves Garlic, minced
2 medium Apples
1/3 c White Wine
1/2 bunch of Kale
1 pinch Salt
1/2 tsp Thyme (dried)

Slice the fennel bulb into 1/4 inch slices. Slice the onion into slightly thinner slices. Core the apple, and slice the apples on a medium setting on the mandolin slicer. Rough chop the kale. Put the fennel, onion, and garlic in a medium sauce pan with olive oil. Cook until the onions are transparent and add the salt and thyme. Add the apples and stir a bit until they are slightly cooked. Add the wine. After the wine has reduced to 1/2, add the Kale.

Sunday, December 26, 2010

Caesar Salad and Spicy Mustard Sauce


When traveling on business to San Francisco, I had the good fortune to be able to have time to visit Cafe Gratitude. I sampled appetizers and had a Caesar salad for the main course, and it was delicious. The capers really made the dish and I promised that I would attempt the dish at home. Yesterday, we spent the better part of the day at my Grandparent's house and I brought the salad for my dinner.

Caesar Dressing
1/2 tsp Spicy Mustard Sauce (recipe below)
6 whole Black Peppercorns
1 small clove Garlic
1/2 cup Macadamia Nuts
1/4 cup water
juice from one Lemon
salt to taste

Put all ingredients in a high speed blender and blend until they are very well combined. The peppercorns should be pulverized and blended well.

Spicy Mustard Sauce
(to be used very sparingly)
1 tsp Mustard Seeds
2 tsp Apple Cider Vinegar
1 tsp Agave
pinch Salt

Put the mustard seeds in a spice or coffee grinder and grind until fine. Stir in the other ingredients. This is really intended to be added to dressings and sauces, not to be enjoyed straight as it is overpowering. It blew out my palate after I had it with slices of quinoa flatbread, lettuce and sauerkraut. I couldn't taste the sauerkraut after the first helping. I would recommend adding to a little whipped cashews or macadamia nuts if you want a mustard spread for flat breads.

Caesar Salad
1 head Romaine, chopped
1 shredded carrot
sprouts
1/4 c. rough chopped almonds
capers
Caesar Dressing

I put the capers and Caesar dressing in small bowls and let people decide the amounts they want on their salad. Some people dislike capers (I don't understand it, but I'll respect it). The almonds and sprouts add some additional nutrition and texture, but aren't necessary.

I don't understand why people say it's hard to stay vegan over the holidays. Perhaps I'd understand it a bit more if I had any inclination to have dairy. Staying dessert free on the other hand...I made two gluten free vegan lemon pies and didn't follow my own advice so today I had a bit of a sugar hangover. At least it makes it easier to stick to the diet going forward!

I hope everyone had a wonderful Holiday! Annie enjoyed her new toys, and we had some fun family moments. There were some awkward and crazy moments too (like when Annie got in a fight with one of the 7 dogs in the house - twice). Seems like there was a dog or two per family segment for about an hour of our visit. It felt like 12 hours. Don't worry, everyone left full and injury free.

Baby "O" really liked Thomas the Train Engine!

My family's beautiful and sweet Bernese Mountain Dog
(definitely not the dog Annie fought with)

Annie with part of her toy stash. Notice the protective
paw over HER reindeer. 100% attitude.

Wednesday, November 24, 2010

Vegan Mofo Day 24: Butternut Squash Soup & Thanksgiving Tips

With Thanksgiving just around the corner, I've been busy trying to figure out what all I am going to make and bring to my family's house. I will bring a vegan side with plenty of veggie protein (there will be salads and I'm making Mashed Potatoes my way). I'm also bringing a couple vegan pies. I know Apple Pie is definitely going to be one of them, and I'm going back and forth between Pumpkin Pie and raw vegan Pecan Pie. I am really hoping things warm up tonight and tomorrow and we don't have to try to battle our way into the Eastside through ice and snow. It has been cold, and Seattle isn't the most equipped to deal with snow and ice.

Annie in her little jacket, ready for some playtime outside

What she really thinks of the camera.

Many of us are enjoying meals with family members who don't share an allergy or a life/food preference. It can be really difficult when people don't understand contamination and appreciate that using one spoon for two things can mean an emergency or severe discomfort to someone with a severe allergy.

Here are some very simple tips I will be following this Holiday.

1. Bring a dish or two that you can eat and share.

I will be bringing a vegetable protein rich dish and helping with sides that I know I am not allergic to and are vegan. If you are able to stand in the kitchen and watch some preparation, you can usually get a good feel for whether or not they understand contamination issues. If you are going to an omnivore house as a vegan, it's also a good idea to bring a couple side dishes. You would be surprised what people think is vegan (I've been offered fish and things with dairy).

Root Roast with Kreamy Parsnip sauce, Kale,
and cauliflower over Miso Cheeze

2. Love dessert like I do? Don't forget to bring yourself a dessert.

It can be very disappointing when you feel forgotten on a holiday. Don't let an allergy or lifestyle preference rob you of dessert -- bring your own.

Cranberry Apricot Tart

3. Bring protein bars.

Just in case you don't get quite enough at the dinner table, an allergy friendly protein bar has saved me from making poor food choices and grabbing something that I would react to or regret later. A Larabar has been my saving grace many times.

What we choose to eat is a very personal matter and can cause heated arguments. People are passionate about food, and usually they mean well. Those of us raised on a traditional diet have been fed nutrition advice by doctors in a very animal protein obsessed society. When I made the switch, my family was very concerned with my health, especially because I am very allergic to soy. I think they are becoming more comfortable with the notion, and I continue to educate myself on the topic. I've found that removing the emotion from the argument and just basing my argument on logical, rational facts surrounding nutrition, food contamination, and health is the soundest approach. I will be doing my best to avoid this conversation on the Holidays. That's not to say I don't speak my mind when prompted.

Butternut Squash Soup


This dish was inspired by Skinny Bitch's Curried Pumpkin Soup in her new book, although I took the dish in a completely different direction. I did like her idea of adding pumpkin seeds to her pumpkin soup for crunch and texture, and will probably try that next time.

2 TB olive oil
1 white onion, chopped
2 apples, chopped
1 tsp fresh ginger, minced or grated
pinch of cinnamon
1 clove garlic
1/2 cup hard apple cider
2 cups carrot juice
1 tsp salt
1 roasted butternut squash
1 cup vanilla hemp milk

Preheat the oven to 400 degrees F. Cut the neck of the butternut squash from the bulb. Cut those sections in half and put them face down in a baking pan with about an inch of water. Cover the baking pan and squash with aluminum foil and bake for about 30-40 minutes or until you can pierce the squash with a fork. Once the squash is done, remove it from the oven and the pan to cool on a rack or plate.

Put a 4 quart+ saucepan over medium heat. Put in 2 Tb of olive oil. When the oil is ready, add the onion, apples, garlic, ginger, and cinnamon and cook for about 8 minutes, or until the onions look translucent. Add the hard apple cider and mix until the alcohol smell has died down. Add the carrot juice, butternut squash, and salt and cook until the apples are very tender.


Take the soup off the heat and put half in a high speed blender with half of the hemp milk. Put the blended portion in a serving bowl and repeat this step with the remaining veggie/apple chunks and hemp milk. Serve while warm.

Monday, November 22, 2010

Vegan Mofo Day 22: Sauerkraut Product Review

I've mention my deep and bordering-on-unnatural love for all things fermented. I need to join a 12 step program or something because my husband has caught me eating sauerkraut straight out of the jar. Is it a need for probiotics? Some mineral I'm deficient in? Not enough salt in my diet? A deep rooted instinct from my germanic genetic memory? I just can't get enough of pickled, fermented foods.

Picking up a new jar of sauerkraut this weekend inspired me to do a little taste testing of the three brands I had in my fridge (See? Addict.).

A (Very) Quick Background on Sauerkraut

Sauerkraut is thought to have originated in Asia. Using salt to preserve foods was not uncommon in Europe, so I'm not sure of the validity of this theory. Moving forward with the theory, as it moved west to Europe when the trade routes opened, Germans embraced the food and replaced the wine and yeast in the fermentation process with salt. Mmmm...Salt. It is rich in probiotics and very good for you.
The Contenders


All three of the brands in my review have three ingredients: cabbage, water, and salt. They are all made the right way - without vinegar, added lactic acid, or "natural spices." I rated each of them on texture, taste, and ethical/sustainable practices.

Brand 1: Bubbies


Likes: I love the texture and taste of Bubbies Sauerkraut. Of the three, it is probably my favorite (flavor wise) because of the tangy, strong flavor. The texture is very good - the pieces of cabbage are a nice consistency with a little bit of crunch. Packaging in a glass jar as opposed to plastic is a plus for me because I don't have to worry about BPAs.

Dislikes: No where on the bottle do they make the claim that they are using cabbage that comes from organic farming practices. They also carry additional pickled products that showcase or incorporate animal products.

Brand 2: Rejuvenative Foods


Likes: The taste is pretty good. Products are labeled as organic. The foods are raw and not pasteurized. All of the products I've browsed on their site or seen in person are, in the majority of cases, vegan. The exception? Some products use honey.

Dislikes: The cabbage is a very minute, pulverized shred, so no crunch for Cami. The taste is alright, but not as tangy as I would like. On a few of the jars, I've seen mold growing up around the lid immediately after time of purchase, even though I replace the lid quickly and do refrigerate. I recently read the label and I am supposed to be keeping things flat in the jar, so perhaps that would help.

Brand 3: Cultured Classics


Likes: The product is local and available at my local farmer's market in Seattle, WA. The cabbage in the product is farmed using organic farming practices. The cabbage cut is very consistent and a very good size. I get some crunch and chewiness from the cabbage. The packaging is in a glass jar with a plastic lid, so I have less worries about leaching. The products available at the farmers market (at least the ones I looked at) were all vegan.

Dislikes: The sauerkraut may not have fermented for quite as long as I like because it was a bit milder than my preference.

The Winner?

Everyone has their flavor and texture preferences, but my winner was Cultured Classics because they are organic, had the texture I was looking for, and a great taste - plus they are local. I am sad I am shelving Bubbies because of the great taste, but will probably turn to Rejuvenative Foods if I can't get to the farmer's market.

Friday, November 19, 2010

Vegan MoFo Giveaway Winner - Brandi! & Creamy Garlic Potatoes


Brandi has won a copy of Ani Phyo's Raw Food Essentials! Please contact me at thediscerningkitchen@gmail.com with mailing info so I can send the book to you. I hope this book will help you add more delicious raw food into your diet!


I have been taking part in creating some great dishes lately in preparation for Thanksgiving, but the camera has not been available to capture them. Last night we had a few friends over for dinner and enjoyed roasted garlic potatoes, sauteed kale, spinach dip, sliced veggies, and cranberry chutney (which oddly went really well with the potatoes and spinach). For dessert - Gluten Free Apple Pie. Tonight it was No Clam Chowder. Despite the lack of pictures, I will post the recipe for very garlicky mashed potatoes - and hopefully return soon to post a picture.

Creamy Garlic Potatoes
Serves 4 people with some left overs
4 medium-large Yellow Skinned potatoes (you can use red or russet, but this is the variety I chose)
2/3 cup cashews
2/3 cup water
1 head of garlic (yep, the whole thing)
1 tsp salt
1/2 lemon, juiced

Cut the top off the garlic head exposing the tops of the cloves. Drizzle a small amount of olive oil over the top, and put the garlic into the oven, preheated to 400 degrees. I can usually tell it's done when the house starts to smell of garlic (10-15 minutes?). The garlic will not discolor, but become a little transparent and be pierced easily with a fork.

Cooking the potatoes: Thoroughly scrub the skins of the potatoes and rinse them. Place the potatoes (skin on) in a large pot of salted water and set the burner temperature to medium. It will take around 30-45 minutes to boil the potatoes; cook until the potatoes are easily pierced with a fork.

Take the potatoes out of the water, drain them, and use a cooking mitt to hold them while you peel them. You don't want cold mashed potatoes, do you? :) Mash in a large bowl with a potato masher.

Put the cashews, water, lemon, salt, and all of those roasted garlic cloves in that head into a high speed blender. Blend until smooth and creamy. Slowly combine the liquid into the mash potatoes. If you want really creamy potatoes, use a hand mixer until you have achieved the consistency you like. I prefer mine lumpy.

Potato Tips: Potatoes need to be stored carefully and used quickly. One they start to develop green sprouts or a greenish hue to the skin, they have a toxin called solanine. The solanine is not in the green areas specifically (that's chlorophyll), but is rather an indicator that the toxin is present. Cutting off the green skins is not sufficient. While it takes a large amount of green potatoes (4+ lbs according to snopes.com) to start developing symptoms, it's best to not to buy them in excess. Those cheap 10 pound bags aren't always the bargain they seem - wasted food is very expensive.

Potato Storage: Storing potatoes out of the reach of light will increase the shelf life. I put mine in a cabinet in my kitchen. Storage temperatures are ideally mild, but not overly cold. When the weather is overly warm or your house gets too cool in the winter, they will age faster.

Monday, November 8, 2010

Vegan Mofo Day 8: Scalloped Turnips and Potatoes

Scalloped potatoes was always a favorite dish of mine as a kid. I had severe allergies to many kinds of foods, especially dairy. After the age of 8, all of those allergies "magically" (read temporarily) disappeared and I was able to eat whatever I wanted. I really embraced that concept after the age of 18. College was full of very gross food. Before the age of 18, scalloped potatoes was a rare fat fest. When the allergies came back, I swear having a childhood full of healthy foods made it easier for me to give up the foods I was getting sick from (eating something and feeling very ill immediately afterwards helped too). The more I read about those foods, the less I miss them. I do remember cheesy scalloped potatoes though. I don't so much miss the cheese as the onion-y layers of starchy goodness.

I bought these really gorgeous turnips at the farmer's market yesterday and I started thinking about oven roasting them. Then my mind worked its way back to my childhood favorite, and I decided to kick up the health level a bit by cutting back on the potatoes, adding turnips, forgoing any dairy (of course), and focusing on a strong flavor profile. Ginger, sea salt, and sesame oil are a very rich combination. My husband enjoyed this dish very much, and I had to remind him to leave me some for my lunch tomorrow.


Scalloped Turnips and Potatoes
About 4 servings as a main dish
4 mid-sized turnips
2 red potatoes
1/3 of an onion
1 tsp ginger, fresh grated
3 Tb sesame oil
Garlic powder to taste
a few pinches of salt

Thinly slice the turnips, red potatoes, and onion using a mandolin slicer. Put down a layer of turnips, then potatoes, then scatter some onions, and grate some ginger over the top.


Pour a small amount of sesame oil over the top and then add a pinch of salt. Keep repeating the layers. I sprinkled a little garlic powder over the top layer, although I wouldn't say it's necessary by any means.


Cook in a preheated oven at 375 degrees F for about 30 minutes.

Turnips are really watery, so if that bothers you, you can try adding a little tapioca starch to thicken things up. It really didn't bother us, and you can use the leftover juice to form a vegan gravy or sauce.

Tuesday, November 2, 2010

Vegan Mofo Day 2: Pomegranate Guacamole


OK, this may sound a little odd, but you have to trust me when I say it is a party favorite. It's also quite striking visually. It goes well with plantain chips I buy from Trader Joes (or make myself), although I usually eat it with chopped jicama and parsley root. I also love this with Gluten Free Tortillas II, romaine lettuce, and sautéed mushrooms or over a grilled portabello mushroom cap (pictured).

I saw a very similar recipe several years ago in Bon Apetit magazine, and I have since heard about a variation on Rachel Ray's show using pomegranate juice instead of the seeds (I'm sorry, but yuck. You lose that beautiful texture and most natural pomegranate juice is very sub-par to fresh). Every time I serve this I'm met with skepticism and then someone inevitably asks to take home the leftovers.

Pomegranate Guacamole
1 Pomegranate - seeds
1/3 cup White Onion, finely chopped
2 Avocados, mashed
1/2 tsp Salt
1 Lime juiced
1/4 cup Cilantro, very finely chopped

Combine the ingredients and serve promptly.
Tips on de-seeding a pomegranate:
  1. Wear a red shirt. Preferably crimson.
  2. Cut the pomegranate in half.
  3. Immerse the pomegranate in a large bowl of water.
  4. Gently pull the seeds free of the pithy part.
I am a full contact chef and usually end up wearing at least part of my meal. In fact, this evening I ended up wearing some of my ginger miso carrot spread. It adds to the dining experience. Pomegranate is an exceptionally messy fruit, and even the most seasoned chefs end up making a mess. I've seen people attack the fruit with the back of a spoon after they halved it - sending seeds mostly in the direction they intended - but the water technique really helps cut down on the mess. If you don't mind decorating your counter tops or want to scare the bujeezus out of your roommates, feel free to skip the water and wrestle with that bad boy bare handed. Annie (half pig, half dog) really enjoys pomegranate, so when I manage to get a little too frisky with my fruit and seeds fly, she is always happy to play Hoover.


"DID SOMEONE SAY POMEGRANATE????"


Saturday, October 16, 2010

Gluten Free Tortillas II


I prefer this recipe over Tortillas I personally because there isn't any starch and it is closer to a whole food. It also avoids rice. It does tend to crack slightly more, but does hold up well to folding when it's warm.

Tortilla II
makes three 5" tortillas
1 cup amaranth
1 heaping tsp palm oil
2-4 Tb water

Use a fork to work in the palm oil. Add the water a little bit at a time to get to a workable consistency. You want it wet enough to stick together well, but not so wet that it clings to your hands much or rolling pin. Dust a surface with amaranth flour, and dust the top of the dough ball and roll out with a rolling pin:

Throw the disk into a hot frying pan heated to medium heat and flip after about 4 minutes or several blisters form:


Take the tortilla out of the pan after another 2 minutes to brown the other side:


Serve when warm. These are pretty easy to make, so I make them after the rest of my ingredients are prepped and are just on low heat to keep them warm.

Friday, October 15, 2010

Gluten Free Tortillas I

A few weeks ago, Lance and I tried some store bought gluten free tortillas that really fell flat. I appreciated that they were vegan, but they didn't tolerate being used as a wrap and would shred, leaving us with a big mess. Fresh made tortillas are worth the little bit of extra effort and tolerate being used as a wrap much better. I have a few different tortilla variations, but this has been my husband's favorite so far - probably because they are the closest to wheat flour tortillas he is used to.

Tortilla with guacamole, mac sour creme, and portabello fajita filling

Tortillas I
makes six 5" tortillas
1/4 c Potato Starch
2/3 c Amaranth Flour
1/3 c White Rice Flour
1 tsp Salt
2-3 TB palm oil (Spectrum Shortening is what I use)
2 Tb Water

Thoroughly combine the dry ingredients with a whisk. Potato starch has a tendency to clump, so be sure to pay special attention. Add the palm oil and combine with a fork or your hands. I find it works better to get in there with my hands to make sure things are combined evenly. Add a little bit of water at a time. What you want is a consistency that sticks together but does not stick to your hands.

Take a 1 1/2" ball of dough and put it on a rolling surface dusted with white rice flour. Dust the top of the ball of dough as well so it doesn't stick to your rolling pin. Roll the ball of dough out into a thin disk and carefully put the disk into a pre-heated frying pan (at medium heat). It will blister up a bit when it is ready to flip (after around 4 minutes). Don't worry, those will disappear once you flip it over.

Cook another 2-3 minutes on the other side.

Ideally, these should be cooked as the rest of your taco meal is nearly finished. My husband helped with the macadamia sour creme and guacamole as I cooked the portabello fajita filling along side the tortillas. It was a lot of multi-tasking, but the meal was quite good if we do say so ourselves. I need to work on the portabello marinade a bit before it's blog worthy.