Thai food was one of the hardest things for me to give up. I remember doing an overhaul on my diet and taking out everything I was allergic to, except for a periodic visit to a Thai restaurant. Which meant searching out the nearest restroom and developing a mental map of bathrooms on the route home. I couldn't figure out what I was allergic to on the menu. Was there soy in something? Was it the mysterious fish sauce? It was probably a saving grace that I became vegan, which rules out a lot of the "vegetarian" dishes on the menu and prevents the sketchy ride home (unfortunately, a lot of vegetarian listed items still have fish or oyster sauce).
It is really hard to find a good Phad Thai recipe on the internet, but I am really hoping people like this recipe. The vinegar adds the tang of the fish sauce, and tamarind lends a more authentic taste. My family enjoys it. I like to just cook up the sauce without the noodles, sprouts, coconut aminos, or water and use it as a sweet and sour sauce on fresh, shredded veggies.
Phad Thai
4 cloves garlic, minced
4 shallots, sliced
1/2 c. fresh tamarind paste (recipe below - if you can't do fresh, do 3-4 Tb of packaged tamarind paste)
1/2 tsp tumeric
2 T apple cider vinegar
1 1/2 T maple syrup
2 T coconut aminos (or 1 T tamari if you aren't allergic)
1/4 t+ cayenne pepper (or more to taste)
1/2 t salt
1 lime juiced
1 pack rice noodles, pre-soaked for at least 30 minutes in cold water
1/4 c water
1-2 cups mung bean sprouts
3 scallions, cut on the bias
Garnish:
shredded carrots, red cabbage, and peanuts (all optional)
Pre-soak rice stick noodles for 30 minutes in cold water. The noodles should be very pliable, but not mushy or slimy. Heat up a wok over the stove top to medium heat, and add an oil that tolerates high temperatures (coconut oil or grapeseed oil work very well). Add the shallots and garlic and cook until the shallots start becoming translucent. Add the tumeric, tamarind paste, apple cider vinegar, maple syrup, coconut aminos, and cayenne pepper. Cook until the ingredients are well combined and the vinegar smell diminishes a bit. Add the noodles and stir until the noodles are well coated. Add 1/4 cup of water, lime juice, and bean sprouts. Add the scallions and toss after the mung beans have cooked a bit.
Want a lower carb option?
White rice noodles are high in simple carbohydrates and starch. Use a vegetable spiralizer or potato peeler to create zucchini noodles. Cook everything but the zucchini noodles (and omitted rice noodles of course) as outlined above, and combine the garnish and sauce with the raw zucchini noodles before serving.
Tamarind Paste
My friend came over the other day for dinner and a movie and saw me working with the tamarind. "WHAT IS THAT???" She thought I was conducting some massively unsanitary project in my kitchen and I had to laugh. If you are lucky enough to live near an Asian market with fresh tamarind pods, I recommend going to the trouble of making your own paste. Fresh always tastes best. They aren't very visually appealing, but they add a lot of flavor to sauces!
Tamarind pods have a hard outer shell, and a sticky, fibrous, pod-filled interior. Crack the outer shell and pull out the interior. Be alert for any signs of mold. Pull the vein-like fibers off the tamarind and put them in a pot of water. Turn the heat on and cook for 20 minutes. It does not need to come to a full boil - a low simmer is plenty. Some people use their hands to squish the tamarind and remove seeds and fibers, but I prefer to use a fine mesh sieve and wooden spoon. A little water transferred from the pan is fine, but you don't want to intentionally use the pan water in your paste. The paste is best used the same day, but will keep in the fridge for an additional 2 days.
My name is Cami and my passion is creating delicious food that happens to be free of major allergens. After becoming tired of spending big bucks on disappointing fare, I went on a mission to discover new ways to spice up old favorites. I do not use corn, soy, dairy, eggs, gluten, and most of my recipes are free of other major allergens.
Search This Blog
Showing posts with label entree. Show all posts
Friday, August 12, 2011
Sunday, July 24, 2011
For The Love Of Quinoa....
My husband recently had a conversation with someone who was finding it a struggle to go gluten free. He suggested quinoa, and got a wrinkled nose and "Yuck." My husband thought it was funny because he really enjoys quinoa, but we both forget it was a love we had to develop over time. Quinoa has a distinctive flavor that I've heard described as nutty or "healthy." I'll admit that the first few times I tried it, I wasn't its biggest fan. That changed as I learned some great ways to prepare quinoa and how amazing the grain is.
Quinoa is actually a small berry rather than a grain. It is in the psuedocereal family, a grain mimicker. I say all the better because this "grain" is jam packed with amino acids and lysine. When combined with a lower lysine grain like rice, sorghum, or millet, you have a protein that is more complete than animal proteins out there, but easier to digest. We use quinoa in a large variety of ways - hoe cakes, flat bread, sides, vegan burgers (recipe follows), and salads are a few. I generally recommend using this grain in savory dishes as opposed to desserts.
Easy Quinoa
1 cup Quinoa
2 cups Water
1/2 lemon, juice
1/3 tsp salt or to taste
pepper to taste
fresh chopped herbs like chives, oregano, thyme, etc.
garlic powder to taste (optional)
Soak the quinoa in water for 20 minutes, and then use a fine sieve to drain the water and rinse. Add 2 cups of water and salt, and bring the quinoa to a boil. Turn the heat down a bit and cook until the water is absorbed. Use a fork to fluff the quinoa up, much like you would couscous, and add the lemon juice, pepper, and fresh herbs. Serve with salads, main dishes, and more. The lemon helps lighten the flavor. My 2 year old nephew approves, and this was one of the first ways I made quinoa and enjoyed it.

I picked up the Veggie Burgers Every Which Way book during a going out of business sale at a book shop. At first I was slightly disappointed at how many of the yummiest looking burgers were lacto-ovo vegetarian instead of vegan, but then I snapped out of it and realized I could use my newest technique to vegan-ize them!
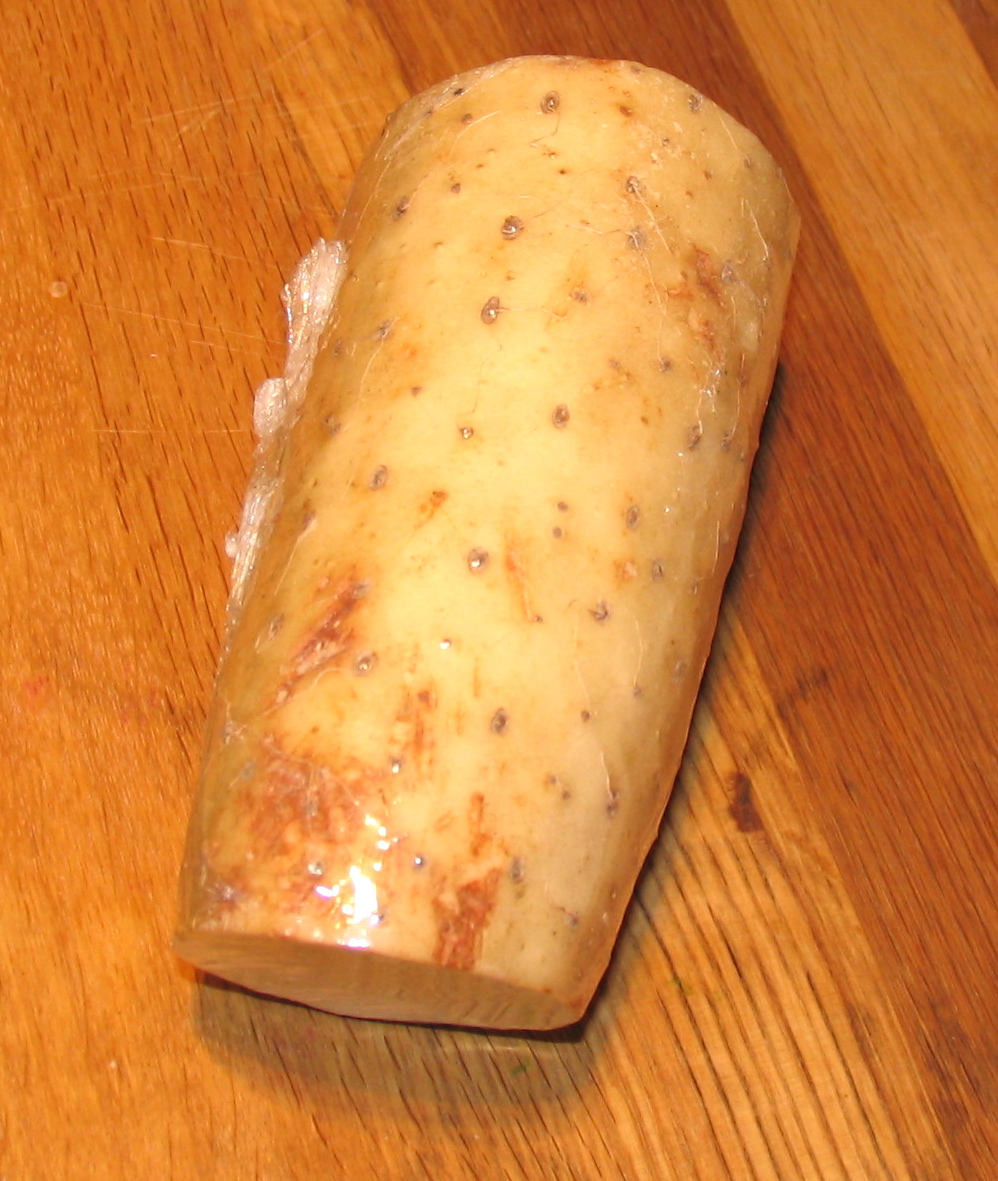
I have started using yamaimo, or Japanese Mountain Yam, as an egg replacer in several dishes. Yamaimo is a little hard to get a hold of, but if you have an Asian grocery market in your area, you may be in luck. These tubers grow as long as 3 feet, and have a really peculiar trait. Once they are cut open, you can feel SLIME on the surface of the flesh. When a yamaimo is shredded, it has the slimy texture of a raw egg. If you can get past the texture issue, it is a great binder and it is used in Chinese medicine as a healing agent for the stomach and intestines.
Yamaimo with plastic wrap around the exterior so it doesn't
leave a gooey puddle in my fridge
Yamaimo grated - you can still see the grated pieces because I used a normal
sized grater, but there is also a pool of slimy liquid.
If you look closely, you can see a slime bubble on the surface of the
whole piece of yamaimo.
Quinoa is actually a small berry rather than a grain. It is in the psuedocereal family, a grain mimicker. I say all the better because this "grain" is jam packed with amino acids and lysine. When combined with a lower lysine grain like rice, sorghum, or millet, you have a protein that is more complete than animal proteins out there, but easier to digest. We use quinoa in a large variety of ways - hoe cakes, flat bread, sides, vegan burgers (recipe follows), and salads are a few. I generally recommend using this grain in savory dishes as opposed to desserts.
Easy Quinoa
1 cup Quinoa
2 cups Water
1/2 lemon, juice
1/3 tsp salt or to taste
pepper to taste
fresh chopped herbs like chives, oregano, thyme, etc.
garlic powder to taste (optional)
Soak the quinoa in water for 20 minutes, and then use a fine sieve to drain the water and rinse. Add 2 cups of water and salt, and bring the quinoa to a boil. Turn the heat down a bit and cook until the water is absorbed. Use a fork to fluff the quinoa up, much like you would couscous, and add the lemon juice, pepper, and fresh herbs. Serve with salads, main dishes, and more. The lemon helps lighten the flavor. My 2 year old nephew approves, and this was one of the first ways I made quinoa and enjoyed it.
I picked up the Veggie Burgers Every Which Way book during a going out of business sale at a book shop. At first I was slightly disappointed at how many of the yummiest looking burgers were lacto-ovo vegetarian instead of vegan, but then I snapped out of it and realized I could use my newest technique to vegan-ize them!
I have started using yamaimo, or Japanese Mountain Yam, as an egg replacer in several dishes. Yamaimo is a little hard to get a hold of, but if you have an Asian grocery market in your area, you may be in luck. These tubers grow as long as 3 feet, and have a really peculiar trait. Once they are cut open, you can feel SLIME on the surface of the flesh. When a yamaimo is shredded, it has the slimy texture of a raw egg. If you can get past the texture issue, it is a great binder and it is used in Chinese medicine as a healing agent for the stomach and intestines.
leave a gooey puddle in my fridge
sized grater, but there is also a pool of slimy liquid.
whole piece of yamaimo.
Quinoa Burgers (Adapted from Veggie Burgers Every Which Way)
1 cup quinoa
3/4 cup blanched turnip greens
1/4 cup yamaimo, grated
1/4-1/2 cup finely minced red onion (I love me some onions)
1/2 lemon juiced
3 TB All purpose gluten free flour
1 tsp Hain* baking powder
1 tsp salt
1/4 tsp cayenne pepper
Soak the quinoa for 20 minutes and then rinse. Add a cup and a half of water to sauce pan and cook the quinoa. Preheat the oven to 400 degrees. Blanch turnip greens in boiling water for less than 60 seconds and put in an ice bath so they stay a vibrant green (this stops the cooking process). After the greens are cool, squeeze the water out. Put the quinoa, greens, yamaimo, gluten free flour, onion, lemon juice, baking powder, salt, and cayenne pepper in a mixing bowl and combine. Form patties on a baking sheet lined with baking paper and bake for 25-30 minutes in the oven.
I boil the turnips and serve along side the burgers with a kohlrabi apple slaw with a macadamia mustard sauce. We brought the burgers to a potluck today and people seemed to like them.

1 cup quinoa
3/4 cup blanched turnip greens
1/4 cup yamaimo, grated
1/4-1/2 cup finely minced red onion (I love me some onions)
1/2 lemon juiced
3 TB All purpose gluten free flour
1 tsp Hain* baking powder
1 tsp salt
1/4 tsp cayenne pepper
Soak the quinoa for 20 minutes and then rinse. Add a cup and a half of water to sauce pan and cook the quinoa. Preheat the oven to 400 degrees. Blanch turnip greens in boiling water for less than 60 seconds and put in an ice bath so they stay a vibrant green (this stops the cooking process). After the greens are cool, squeeze the water out. Put the quinoa, greens, yamaimo, gluten free flour, onion, lemon juice, baking powder, salt, and cayenne pepper in a mixing bowl and combine. Form patties on a baking sheet lined with baking paper and bake for 25-30 minutes in the oven.
I boil the turnips and serve along side the burgers with a kohlrabi apple slaw with a macadamia mustard sauce. We brought the burgers to a potluck today and people seemed to like them.
Labels:
burger,
corn free,
dairy free,
egg free,
entree,
gluten free,
quinoa,
side,
soy free,
veggie burger
Sunday, April 17, 2011
Winter Vegetables with Celerly Root Puree
I was a little pout-y about not being able to eat fruit and starchy foods, and it was about time to snap out of it and start creating some tasty, lower carbohydrate meals. Seattle is unseasonably cold right now. The plants are just starting to bud out and our little garden is under a cloth cover, which is a good thing because we've had some frosty mornings lately. The freshest foods are still the early spring crops - arugula, kale, greens, leeks, fennel, and root vegetables.
I decided to try a celery root puree with winter vegetables yesterday. I am a garlic fanatic, so added more garlic than some people may like. The puree would be a great alfredo substitute as it is very creamy. Celery Root (celeriac) has 1/3 the carbohydrates, less than half the calories, and the same amount of fiber as potatoes. It also has a very velvety texture and lends well to purees.
Winter Vegetables with Celeriac Puree
Puree
1 celery root
4 cloves garlic
2-3 T olive oil
1/4-1/2 tsp salt
fresh ground pepper to taste
1/4+ water
Clean, peel, and dice the celery root into 1/2 inch or smaller cubes. Mince the garlic. Heat a pan over medium heat and get the olive oil hot. Put the garlic in the oil until it becomes very aromatic (less than a minute; 15-30 seconds). Add the celeriac and cook until the root is easy to pierce with a fork. Take off the heat and let cool a little. Put the celeriac and garlic in a blender, along with any of the excess olive oil. Add enough water to get the blender blades turning smoothly and add the salt and pepper.
Winter Vegetable Saute
1 leek
1 fennel bulb
1 bunch kale
1/2 tsp caraway
1/2 tsp mustard seeds
pinch salt
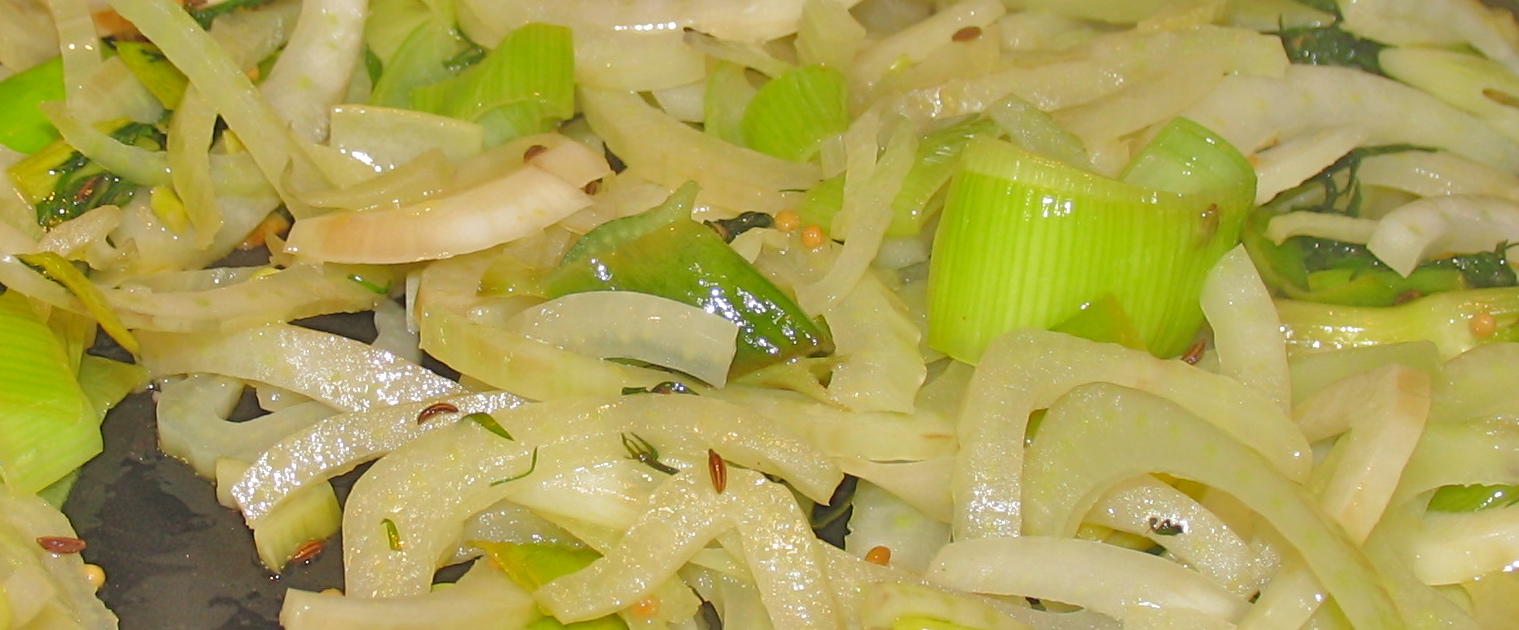
Thoroughly clean the leeks by slicing the leeks into rings and soaking them in a big bowl of water with a tsp of apple cider vinegar. Cut the base off the fennel and slice it with a mandolin slicer (slicing thinly with a good knife works too). Put the pan over medium heat and add some olive oil after the pan warms up. When the oil is warm, add the leeks. Once the leeks turn into a vibrant color, add the fennel, mustard seed, and caraway. Add the fennel.
Once the fennel is slightly translucent, add the kale and salt.
When I first made this, I put the saute over some kelp noodles. Noodles add nothing to this dish - it was much better with just the saute and celeriac puree.
Labels:
corn free,
dairy free,
egg free,
entree,
gluten free,
recipe,
soy free
Sunday, December 26, 2010
Caesar Salad and Spicy Mustard Sauce
When traveling on business to San Francisco, I had the good fortune to be able to have time to visit Cafe Gratitude. I sampled appetizers and had a Caesar salad for the main course, and it was delicious. The capers really made the dish and I promised that I would attempt the dish at home. Yesterday, we spent the better part of the day at my Grandparent's house and I brought the salad for my dinner.
Caesar Dressing
1/2 tsp Spicy Mustard Sauce (recipe below)
6 whole Black Peppercorns
1 small clove Garlic
1/2 cup Macadamia Nuts
1/4 cup water
juice from one Lemon
salt to taste
Put all ingredients in a high speed blender and blend until they are very well combined. The peppercorns should be pulverized and blended well.
Spicy Mustard Sauce
(to be used very sparingly)
1 tsp Mustard Seeds
2 tsp Apple Cider Vinegar
1 tsp Agave
pinch Salt
Put the mustard seeds in a spice or coffee grinder and grind until fine. Stir in the other ingredients. This is really intended to be added to dressings and sauces, not to be enjoyed straight as it is overpowering. It blew out my palate after I had it with slices of quinoa flatbread, lettuce and sauerkraut. I couldn't taste the sauerkraut after the first helping. I would recommend adding to a little whipped cashews or macadamia nuts if you want a mustard spread for flat breads.
Caesar Salad
1 head Romaine, chopped
1 shredded carrot
sprouts
1/4 c. rough chopped almonds
capers
Caesar Dressing
I put the capers and Caesar dressing in small bowls and let people decide the amounts they want on their salad. Some people dislike capers (I don't understand it, but I'll respect it). The almonds and sprouts add some additional nutrition and texture, but aren't necessary.
I don't understand why people say it's hard to stay vegan over the holidays. Perhaps I'd understand it a bit more if I had any inclination to have dairy. Staying dessert free on the other hand...I made two gluten free vegan lemon pies and didn't follow my own advice so today I had a bit of a sugar hangover. At least it makes it easier to stick to the diet going forward!
I hope everyone had a wonderful Holiday! Annie enjoyed her new toys, and we had some fun family moments. There were some awkward and crazy moments too (like when Annie got in a fight with one of the 7 dogs in the house - twice). Seems like there was a dog or two per family segment for about an hour of our visit. It felt like 12 hours. Don't worry, everyone left full and injury free.
(definitely not the dog Annie fought with)
Annie with part of her toy stash. Notice the protective
paw over HER reindeer. 100% attitude.
Wednesday, November 10, 2010
Vegan Mofo Day 10: Raw Vegan Private Chefs and Raw Wraps
Tonight Lance and I fixed our dinners and sat down to watch The Private Chefs of Beverly Hills. I love this show. I still watch non-vegan cooking shows to get ideas for my own food (and I love DVR because I can fast forward through some parts). Sometimes there are some really creative combinations out there that can translate really well to vegan and even raw vegan. Sometimes I just get to sit there and be a little bit horrified.
Tonight I watched Chef Jesse and Chef Brooke uncook for a crowd of people. They were so mystified by the whole thing! My husband and I were pretty entertained and I cringed as I watched them put their first courses together. I felt bad for them! You don't go to culinary school to learn how to appreciate a Vitamix, dehydrator, and food processor. And I just about died when I watched Chef Brooke make dehydrator sweet potato chips without any oil or the sliver thin cutting ability of a mandolin slicer. Sweetie, it happens to the best of us! I've made rubber chips too. I love, love, love Chef Jesse and was happy to see him succeed in the end, and Chef Brooke's dessert looked very fabulous. If y'all ever need an allergy expert who knows how to do funky things with food, look me up!
I don't understand why someone would hire professional chefs who spend their times cooking traditional, high-end meals to produce a raw vegan spread. The techniques are completely different and it takes a lot of experimentation to get the flavor combinations down. Flavors combine to trick the mind into thinking you're eating something you are not, and a lot of times the flavors you are combining sound gawd awful to the newbie. Things taste so different to me cooked than they do raw. Garlic, for example. It's almost sweet to me cooked and I can't get enough, but raw is a bitter, overpowering experience if you don't use a light hand.
I've spoken with a lot of people who are new to raw and frustrated with kitchen failures. It takes a lot of practice and a few throw outs, but after you get used to the basics, it's a breeze. I was strictly raw for about a year, and after the first couple months of experimenting, I moved on to accepting that things were different and appreciating foods in their whole state. Now I'm back to cooked vegan and loving that as well, but I try to keep a lot of fresh, whole, uncooked foods in my diet.
Some Easy Raw Wraps
Raw can be really easy - it's all about what kind of food you are craving at that minute. I really enjoy wraps because there's a nice, satisfying crunch and usually a rich sauce to combine with the wrap ingredients. Below are a couple quick recipes and wrap combinations I enjoy on a regular basis. I have to thank my friend, Catherine, for the miso spread recipe. She listed off some ingredients she likes to combine one day, and I ran with it.

Ginger Miso Spread3 peeled carrots, cut into 1 inch lengths
1/2 inch peeled ginger
2 Tb tahini
1 clove garlic
1 pinch salt
1/2 lemon, juice
1 heaping TB of Soy Free Miso
3 TB minced red onion
1 rib of minced celery
I was SO excited when I found out that soy free miso existed. I ate it for 8 straight meals - I kid you not. South River Miso makes an excellent Adzuki Miso that I highly recommend. It's a bit sweeter than a Chickpea alternative that I also love by Miso Master. Miso is probably not considered raw by purists, but tahini can be raw if it's slowly processed. There are commonly available brands, like Artisana, that are raw. You can also make your own if you have a slick enough blender and enough patience. As I've said before, I have zero patience.
I don't bother grating the carrots. I throw all of the ingredients except for the onion and celery into a Cuisinart Food Processor and just whir away until I have a well combined spread. This is a super tangy sauce and works well in lettuce bundles with cilantro, sprouts, and cucumber.
Lettuce Rawcos
My favorite thing about raw? The prep time is non existent. I'm cutting and chopping and suddenly I'm eating. The cook time and waiting around is gone.

Guacamole
2 large avocados
1 shallot, minced
1/4 cup cilantro, chopped
1 lime, juice
salt and pepper to taste
Mash the avocado and then combine the rest of the ingredients, mixing well.
Remoulade/White Taco Sauce1/2 c macadamia nuts
1/2 c water
1/4 tsp cayenne pepper
1/2 lemon, juiced
1/2 tsp salt
1/4 tsp cumin powder
pinch of dill
Combine the ingredients in a blender and blend until smooth.
Salsa1 beefsteak tomato, diced
1/2 Serrano chili
1/4 white onion
handful cilantro
pinch salt
pinch pepper
garlic clove chopped, optional
Mix.
Throw the Salsa, White Sauce, Guacamole, and some sprouts on top of some lettuce leaves and enjoy! The less you think about raw preperation, the better the food will be. Breakfast today was a couple hand fulls of mandarin oranges (which will be better in a couple months...made a note to myself - they aren't quite in season yet, and you can tell).
Monday, November 8, 2010
Vegan Mofo Day 8: Scalloped Turnips and Potatoes
Scalloped potatoes was always a favorite dish of mine as a kid. I had severe allergies to many kinds of foods, especially dairy. After the age of 8, all of those allergies "magically" (read temporarily) disappeared and I was able to eat whatever I wanted. I really embraced that concept after the age of 18. College was full of very gross food. Before the age of 18, scalloped potatoes was a rare fat fest. When the allergies came back, I swear having a childhood full of healthy foods made it easier for me to give up the foods I was getting sick from (eating something and feeling very ill immediately afterwards helped too). The more I read about those foods, the less I miss them. I do remember cheesy scalloped potatoes though. I don't so much miss the cheese as the onion-y layers of starchy goodness.
I bought these really gorgeous turnips at the farmer's market yesterday and I started thinking about oven roasting them. Then my mind worked its way back to my childhood favorite, and I decided to kick up the health level a bit by cutting back on the potatoes, adding turnips, forgoing any dairy (of course), and focusing on a strong flavor profile. Ginger, sea salt, and sesame oil are a very rich combination. My husband enjoyed this dish very much, and I had to remind him to leave me some for my lunch tomorrow.

Scalloped Turnips and Potatoes
About 4 servings as a main dish
4 mid-sized turnips
2 red potatoes
1/3 of an onion
1 tsp ginger, fresh grated
3 Tb sesame oil
Garlic powder to taste
a few pinches of salt
Thinly slice the turnips, red potatoes, and onion using a mandolin slicer. Put down a layer of turnips, then potatoes, then scatter some onions, and grate some ginger over the top.

Pour a small amount of sesame oil over the top and then add a pinch of salt. Keep repeating the layers. I sprinkled a little garlic powder over the top layer, although I wouldn't say it's necessary by any means.

Cook in a preheated oven at 375 degrees F for about 30 minutes.
Turnips are really watery, so if that bothers you, you can try adding a little tapioca starch to thicken things up. It really didn't bother us, and you can use the leftover juice to form a vegan gravy or sauce.
I bought these really gorgeous turnips at the farmer's market yesterday and I started thinking about oven roasting them. Then my mind worked its way back to my childhood favorite, and I decided to kick up the health level a bit by cutting back on the potatoes, adding turnips, forgoing any dairy (of course), and focusing on a strong flavor profile. Ginger, sea salt, and sesame oil are a very rich combination. My husband enjoyed this dish very much, and I had to remind him to leave me some for my lunch tomorrow.

Scalloped Turnips and Potatoes
About 4 servings as a main dish
4 mid-sized turnips
2 red potatoes
1/3 of an onion
1 tsp ginger, fresh grated
3 Tb sesame oil
Garlic powder to taste
a few pinches of salt
Thinly slice the turnips, red potatoes, and onion using a mandolin slicer. Put down a layer of turnips, then potatoes, then scatter some onions, and grate some ginger over the top.

Pour a small amount of sesame oil over the top and then add a pinch of salt. Keep repeating the layers. I sprinkled a little garlic powder over the top layer, although I wouldn't say it's necessary by any means.

Cook in a preheated oven at 375 degrees F for about 30 minutes.
Turnips are really watery, so if that bothers you, you can try adding a little tapioca starch to thicken things up. It really didn't bother us, and you can use the leftover juice to form a vegan gravy or sauce.
Sunday, November 7, 2010
Vegan Mofo Day 7: Stir Fry with Peanut Sauce
Lance and I had a busy day today. We went to watch a few races (men's and women's 10k running) with the dogs. Lance had intended to run, but his hip flexor has been bugging him since Wednesday's work out, so we were all spectators.
After the race, we went to The Chocolate Shoebox in the north Phinney/Greenwood neighborhood of Seattle. The store is one of the only stores I know of in Seattle that exclusively sells vegan shoes, purses, wallets, and belts, and they also carry a small assortment of chocolates. I honestly wasn't very impressed with the local chocolates - most of them had corn syrup, or some other filler. Overall, I liked the store and the staff was very friendly. The shoes were kind of middle of the road for me - they had some cute quirky stuff but I'll probably keep looking online for more work shoes. I'll be back - but what I was super excited about was the nail polish! It was formaldehyde free, so I bought a couple bottles on an impulse.
After some light shoe shopping, we all headed over to the Capitol Hill farmer's market. I was on a mission for kombucha or fermented veggies. We didn't see any and the dogs were a little on people overload after a busy race and crowded market, so I just stopped by an organic farm stand and got some beautiful arugula, turnips, and a few other veggies.
By the time we all got home, we were pretty hungry, so I cooked up a big stir fry with peanut sauce. The sauce had a decent amount of fat in it, so by the time I had eaten my fill, I was ready for a nap!
I always try to poke around the Internet and learn new things from other vegans out there. Hyper-Nerdy Veganism had a great recipe post emphasizing the importance of mise en place. Mise en place is one of the first things that a culinary instructor will teach. It's the process of gathering all necessary ingredients and preparing them in a clean and orderly fashion. The idea is to make it easier to follow food safety by keeping certain ingredients separate (not as much of an issue for vegan dishes), and keep them in their place. I try to use bowls for each stage of cooking - which used up quite a bit of bowls today.

The peanut sauce would go well as a satay dip or over spinach and rice. It doesn't need to be mixed into a stir fry.
Peanut Sauce
1 minced Serrano Chile, de-seeded (unless you like a lot of heat)
2 cloves garlic, minced
1/3 cup Coconut Milk
1/2 cup + Creamy Style Peanut Butter
1/2 a lemon, juiced
pinch of salt
Put a small amount of olive oil in a sauce pan over low medium heat. When the oil is warm enough to elicit a little sizzle out of the garlic, add the garlic and Serrano chile. Do not have the heat very high - I made the mistake of nearly burning everything to a crisp, and then when the peanut and coconut are added things will separate quickly if the temperature is too hot. It's important to cook this over a heat that is lower than medium. Add the coconut milk and peanut butter and just cook long enough to get a bit of bubbling.
Stir Fry
1/2 package phad thai style rice noodles
1/2 an onion, sliced
2 cloves garlic
2 carrots, peeling and julienned
3 ribs of celery, sliced
1 large bunch spinach, washed
1 cup mung bean sprouts
pinch salt
Cilantro to garnish
The trick to non-soggy rice noodles is to soak them in cold water several hours prior to cooking. I put them in a large bowl with cold water in the fridge in the morning before work before I use them.
Heat up a wok over medium heat and add a couple tablespoons of grapeseed or peanut oil. Add the onions, carrots, celery and garlic, stirring and cooking until they begin to sweat a bit. Add the noodles, spinach, and bean sprouts, stirring frequently. Squeeze half a lime over the top and add the salt. After the spinach has cooked down, add the peanut sauce and continue to stir the ingredients together. Spoon into a bowl and put a little cilantro on top as a garnish.
After the race, we went to The Chocolate Shoebox in the north Phinney/Greenwood neighborhood of Seattle. The store is one of the only stores I know of in Seattle that exclusively sells vegan shoes, purses, wallets, and belts, and they also carry a small assortment of chocolates. I honestly wasn't very impressed with the local chocolates - most of them had corn syrup, or some other filler. Overall, I liked the store and the staff was very friendly. The shoes were kind of middle of the road for me - they had some cute quirky stuff but I'll probably keep looking online for more work shoes. I'll be back - but what I was super excited about was the nail polish! It was formaldehyde free, so I bought a couple bottles on an impulse.
After some light shoe shopping, we all headed over to the Capitol Hill farmer's market. I was on a mission for kombucha or fermented veggies. We didn't see any and the dogs were a little on people overload after a busy race and crowded market, so I just stopped by an organic farm stand and got some beautiful arugula, turnips, and a few other veggies.
By the time we all got home, we were pretty hungry, so I cooked up a big stir fry with peanut sauce. The sauce had a decent amount of fat in it, so by the time I had eaten my fill, I was ready for a nap!
I always try to poke around the Internet and learn new things from other vegans out there. Hyper-Nerdy Veganism had a great recipe post emphasizing the importance of mise en place. Mise en place is one of the first things that a culinary instructor will teach. It's the process of gathering all necessary ingredients and preparing them in a clean and orderly fashion. The idea is to make it easier to follow food safety by keeping certain ingredients separate (not as much of an issue for vegan dishes), and keep them in their place. I try to use bowls for each stage of cooking - which used up quite a bit of bowls today.

The peanut sauce would go well as a satay dip or over spinach and rice. It doesn't need to be mixed into a stir fry.
Peanut Sauce
1 minced Serrano Chile, de-seeded (unless you like a lot of heat)
2 cloves garlic, minced
1/3 cup Coconut Milk
1/2 cup + Creamy Style Peanut Butter
1/2 a lemon, juiced
pinch of salt
Put a small amount of olive oil in a sauce pan over low medium heat. When the oil is warm enough to elicit a little sizzle out of the garlic, add the garlic and Serrano chile. Do not have the heat very high - I made the mistake of nearly burning everything to a crisp, and then when the peanut and coconut are added things will separate quickly if the temperature is too hot. It's important to cook this over a heat that is lower than medium. Add the coconut milk and peanut butter and just cook long enough to get a bit of bubbling.
Stir Fry
1/2 package phad thai style rice noodles
1/2 an onion, sliced
2 cloves garlic
2 carrots, peeling and julienned
3 ribs of celery, sliced
1 large bunch spinach, washed
1 cup mung bean sprouts
pinch salt
Cilantro to garnish
The trick to non-soggy rice noodles is to soak them in cold water several hours prior to cooking. I put them in a large bowl with cold water in the fridge in the morning before work before I use them.
Heat up a wok over medium heat and add a couple tablespoons of grapeseed or peanut oil. Add the onions, carrots, celery and garlic, stirring and cooking until they begin to sweat a bit. Add the noodles, spinach, and bean sprouts, stirring frequently. Squeeze half a lime over the top and add the salt. After the spinach has cooked down, add the peanut sauce and continue to stir the ingredients together. Spoon into a bowl and put a little cilantro on top as a garnish.
Friday, October 15, 2010
Gluten Free Tortillas I
A few weeks ago, Lance and I tried some store bought gluten free tortillas that really fell flat. I appreciated that they were vegan, but they didn't tolerate being used as a wrap and would shred, leaving us with a big mess. Fresh made tortillas are worth the little bit of extra effort and tolerate being used as a wrap much better. I have a few different tortilla variations, but this has been my husband's favorite so far - probably because they are the closest to wheat flour tortillas he is used to.
Tortillas I
makes six 5" tortillas
1/4 c Potato Starch
2/3 c Amaranth Flour
1/3 c White Rice Flour
1 tsp Salt
2-3 TB palm oil (Spectrum Shortening is what I use)
2 Tb Water
Thoroughly combine the dry ingredients with a whisk. Potato starch has a tendency to clump, so be sure to pay special attention. Add the palm oil and combine with a fork or your hands. I find it works better to get in there with my hands to make sure things are combined evenly. Add a little bit of water at a time. What you want is a consistency that sticks together but does not stick to your hands.
Take a 1 1/2" ball of dough and put it on a rolling surface dusted with white rice flour. Dust the top of the ball of dough as well so it doesn't stick to your rolling pin. Roll the ball of dough out into a thin disk and carefully put the disk into a pre-heated frying pan (at medium heat). It will blister up a bit when it is ready to flip (after around 4 minutes). Don't worry, those will disappear once you flip it over.

Cook another 2-3 minutes on the other side.

Ideally, these should be cooked as the rest of your taco meal is nearly finished. My husband helped with the macadamia sour creme and guacamole as I cooked the portabello fajita filling along side the tortillas. It was a lot of multi-tasking, but the meal was quite good if we do say so ourselves. I need to work on the portabello marinade a bit before it's blog worthy.
Tortillas I
makes six 5" tortillas
1/4 c Potato Starch
2/3 c Amaranth Flour
1/3 c White Rice Flour
1 tsp Salt
2-3 TB palm oil (Spectrum Shortening is what I use)
2 Tb Water
Thoroughly combine the dry ingredients with a whisk. Potato starch has a tendency to clump, so be sure to pay special attention. Add the palm oil and combine with a fork or your hands. I find it works better to get in there with my hands to make sure things are combined evenly. Add a little bit of water at a time. What you want is a consistency that sticks together but does not stick to your hands.
Take a 1 1/2" ball of dough and put it on a rolling surface dusted with white rice flour. Dust the top of the ball of dough as well so it doesn't stick to your rolling pin. Roll the ball of dough out into a thin disk and carefully put the disk into a pre-heated frying pan (at medium heat). It will blister up a bit when it is ready to flip (after around 4 minutes). Don't worry, those will disappear once you flip it over.

Cook another 2-3 minutes on the other side.

Ideally, these should be cooked as the rest of your taco meal is nearly finished. My husband helped with the macadamia sour creme and guacamole as I cooked the portabello fajita filling along side the tortillas. It was a lot of multi-tasking, but the meal was quite good if we do say so ourselves. I need to work on the portabello marinade a bit before it's blog worthy.
Thursday, October 14, 2010
Pumpkin Lentils

I don't normally post main courses that are easily translated into a gluten free dish, but in the interest of keeping the autumn pumpkin theme, I thought I might as well. It's a great way to use up any leftover pumpkin. This is great over rice or quinoa.
Pumpkin Lentils
1 cup lentils, soaked overnight and thoroughly rinsed
2 cups water
2 Tb grapeseed oil
1 tsp cumin seeds
1/2 onion, diced
3 cloves garlic, minced
1 tsp fresh ginger
1/2 tsp lemon zest
1-2 Tb lemon juice
1/2 tsp salt
1 tsp ground coriander
pinch allspice
1/2 tsp tumeric
1/4 tsp cayenne
1 1/2 cup pumpkin puree
pepper
Fresh chopped cilantro as a garnish
Any time I know I want lentils in the next day or so, I get them out to soak. Soaking and sprouting beans makes them much more digestible, and it greatly shortens the cook time. I try to get them out as I'm cooking dinner the night before so I can rinse them before bed and put them in more soak water and in the fridge for the next day. When I get home from work, they have little sprouts started and are ready for me to thoroughly rinse them and cook them for dinner. Soaking beans helps break down the enzyme inhibitors and remove the complex sugars, oligosaccharides. Oligosaccharides are one of the main sources of gas because they travel through the g.i. tract without breaking down, allowing bad bacteria to feed on them in the small and large intestine. That causes a fermentation, which causes gas. Be sure to throw out the lentil soak water.
Put a pan on medium heat and add 2 Tb of grapeseed oil after the pan warms. Put in the cumin seeds for about a minute and then add the onions, garlic, and finely grated fresh ginger. Let the onions cook until they become translucent and start to sweat. Add the rest of the spices and lemon and thoroughly stir to combine the ingredients. Add in the lentils and 2 cups of water and cover to cook for about 30 minutes. After the water has reduced, add the pumpkin. The lentils should be cooked until they become soft.
Labels:
entree,
gluten free,
gluten free recipe,
soup,
vegan
Monday, September 13, 2010
Saffron Stir Fry
Who says you need soy to have a delicious stir fry?? Every once in a while we have big drawer full of veggies and I don't feel like having another salad. When it's cold and rainy, a nice spicy stir fry sounds great. Any vegetables work, but here's what I used the other day:Saffron Stir Fry
serves 4
2 "cloves" of shallots, sliced
2 cloves of garlic, minced
pinch of saffron
1 tsp cumin
1/2 tsp coriander
1/2 tsp tumeric
1/2 tsp salt
red pepper to taste
3 peeled carrots cut on the bias
3 stalks of celery, diced
1 head of broccoli, rough chop
2 baby bok choy, rough chop
1/4 lb of green beans, rough chop
Optional: Shitake Mushrooms, Daikon, Mung Bean Sprouts
I cut up the vegetables first and separate them into three groups: aromatics, roots & celery, and then the rest. I use a stove top wok pan set to Medium-High. Every stove top is different, so you want it a little warmer than medium, but you don't want anything to brown. I used peanut oil that day because of the high burn temperature, but you can certainly use coconut or grape-seed oil as they both hold up pretty well.
First throw in the shallots. Once they are a little translucent, add the garlic. Do not let the garlic brown, you just want to cook it for a few seconds, until the kitchen starts to smell delicious. Then throw in the root vegetables, celery, and spices. Once the root vegetables are no longer raw, throw in the rest of the vegetables and continue to stir frequently. This is great over any grain, but I usually enjoy it on its own.
Sauteed Pea Pasta

My mom was over this weekend and helped tremendously around the house. To help make her feel welcome, I prepared meals and treats. This pasta salad was very simple, but full of great flavor.
Pea Sauté
2 cups baby peas (petit pois)
2 shallot "cloves"
1 large clove of garlic
handful fresh chopped basil
1 tsp dry tarragon
1/2 tsp salt
olive oil
My peas were frozen, so I threw them in the skillet as it warmed. After the skillet was warm and the peas had thawed, I threw in olive oil, the shallots, and garlic to sauté. Once the shallot was a bit translucent, I added the herbs and salt. It didn't take long at all to prepare.
I boiled some rice pasta for my mom and Lance, and I personally enjoyed the saute on kelp noodles. Macadamia Cheese is a great addition, although I enjoyed mine without.
Saturday, September 11, 2010
Pesto with Noodles: can't do rice? No problem.
My diet is primarily raw vegan. I am vegan, and that is why the vast majority of my recipes are as well. There are a few non-vegan recipes because my husband and nephew have food allergies and are not vegan, and I help them cook their meals. I go back and forth on whether or not to include non-vegan recipes, and I'm not sure where I'll end up.
Because I'm raw vegan, I'm used to flavors that are a bit different from cooked food. If cooked properly, garlic can be a bit sweet. Raw, it really packs a punch. They are completely different flavors to me. I'll explain how to prepare Pesto both ways, and then give you a pesto recipe with a twist. I haven't re-tested this recipe yet, so trust your instincts with proportions. I'll update the recipe very soon.
Pasta Pesto (cooked)
1/2 cup rough chopped basil
1/4 cup olive oil
pinch salt
1 large garlic clove
2 TB olive oil
Put a couple tablespoons of olive oil in a frying pan and lightly saute the garlic for less than a minute. You want to be able to smell the garlic, but you do not want it to brown at all. By then it is burned. Put the sauteed garlic and other ingredients in a food processor and let it run until everything is combined.
Raw Pesto
1/2 cup rough chop basil (not packed down)
1/4 cup olive oil
pinch salt
1/2 lemon, juiced
1 large clove garlic
Because the garlic is not cooked, it has a much stronger flavor, but it goes well with noodles.
I am on a very low carbohydrate raw vegan diet because of some health issues, so instead of rice noodles, I put zucchini and yellow squash through the food processor grater and enjoy them with the pesto. Throw in a few Kalamata olives, and I am one happy camper.

Pesto with a Twist
1/4 cup rough chopped basil
1/4 cup rough chopped cilantro
1/4 cup olive oil
1/2 lemon or 1 lime, juiced
pinch salt
1 clove garlic (optional - taste the mix first)
My favorite Seattle restaurant, Chaco Canyon, serves a delicious cilantro pesto. I've never been able to copy it, but this recipe meets my craving when I don't have time to go out for dinner.
Because I'm raw vegan, I'm used to flavors that are a bit different from cooked food. If cooked properly, garlic can be a bit sweet. Raw, it really packs a punch. They are completely different flavors to me. I'll explain how to prepare Pesto both ways, and then give you a pesto recipe with a twist. I haven't re-tested this recipe yet, so trust your instincts with proportions. I'll update the recipe very soon.
Pasta Pesto (cooked)
1/2 cup rough chopped basil
1/4 cup olive oil
pinch salt
1 large garlic clove
2 TB olive oil
Put a couple tablespoons of olive oil in a frying pan and lightly saute the garlic for less than a minute. You want to be able to smell the garlic, but you do not want it to brown at all. By then it is burned. Put the sauteed garlic and other ingredients in a food processor and let it run until everything is combined.
Raw Pesto1/2 cup rough chop basil (not packed down)
1/4 cup olive oil
pinch salt
1/2 lemon, juiced
1 large clove garlic
Because the garlic is not cooked, it has a much stronger flavor, but it goes well with noodles.
I am on a very low carbohydrate raw vegan diet because of some health issues, so instead of rice noodles, I put zucchini and yellow squash through the food processor grater and enjoy them with the pesto. Throw in a few Kalamata olives, and I am one happy camper.

Pesto with a Twist
1/4 cup rough chopped basil
1/4 cup rough chopped cilantro
1/4 cup olive oil
1/2 lemon or 1 lime, juiced
pinch salt
1 clove garlic (optional - taste the mix first)
My favorite Seattle restaurant, Chaco Canyon, serves a delicious cilantro pesto. I've never been able to copy it, but this recipe meets my craving when I don't have time to go out for dinner.
Monday, September 6, 2010
"Feta" and Walnut Pizza

The first time I made this it was a bit dry. I went too light on the feta and pesto. These are simple ingredients that go well together.
Spinach, "Feta", Walnut Pizza
Pizza Dough I, formed with a crust or lip around the edge to retain moisture
generous lathering of pesto (recipe below)
1/4 Red Onion, sliced thin
1 cup Spinach
1 cup "Feta"
1/2 cup Walnuts
Pesto
1/3 cup Olive Oil
1 bunch Basil
2-3 cloves Garlic
1/2 tsp Salt
Combine the Pesto ingredients in a food processor or blender until well combined.
Feta
1/2 cup macadamia nuts
1/2 lemon, juiced
1/4-1/3 cup water
pinch salt
Combine the "Feta" ingredients in a high speed blender or food processor until combined. It should clump and not be too wet.
Saturday, September 4, 2010
Pizza Dough I
Pizza dough is fairly straight forward if you can have yeast. It's basically warm water, yeast, and sugar (to activate the yeast), a lot of flour, and a little oil. Not much to it. This was my first shot at pizza dough, or any breads or doughs with yeast in them. I am allergic to yeast, so had abandoned pizza a while ago. My husband is not allergic to dairy or yeast and has really missed pizza, so I decided to give it a try. The crust is a little closer to a Chicago Style and is a bit doughy. My mom actually prefers that style, so she enjoyed the pizza. This dough does not have the same elasticity raw that a gluten pizza dough would have, so don't expect to toss the pizza around in the air or be able to roll out the dough.
Pizza Dough I
Makes enough crust for 2 medium pizzas
2 packages of yeast or 4.5 tsp
2 tsp sugar
2 cups warm water (around 110 degrees, so a little warmer than your temp)
3 cups Bob's Redmill All Purpose Gluten Free Flour
2 cups Sorghum Flour
1 cup Tapioca Flour
2 Tb Salt
2 Tb Olive Oil
First, combine the warm water, sugar, and yeast and very gently stir so the yeast doesn't clump too much. Do not add the salt because it will kill the yeast. Wait about 5-10 minutes for the yeast to activate and start foaming. Combine all of the dry ingredients and then pour in the water, sugar, and yeast mixture. Stir with a spoon. Once it becomes hard to stir, put in the oil and knead by hand. Once the dough is kneaded, put it in an oiled bowl and cover with plastic wrap and a towel and put in a warm place. Let it sit for about an hour, or until the dough roughly doubles in size.
The dough will double in size, here's the dough before I let it rest:

I put it on a warm stove I was baking scones in, and the dough rose pretty quickly. It's not as a dramatic raise as gluten dough:

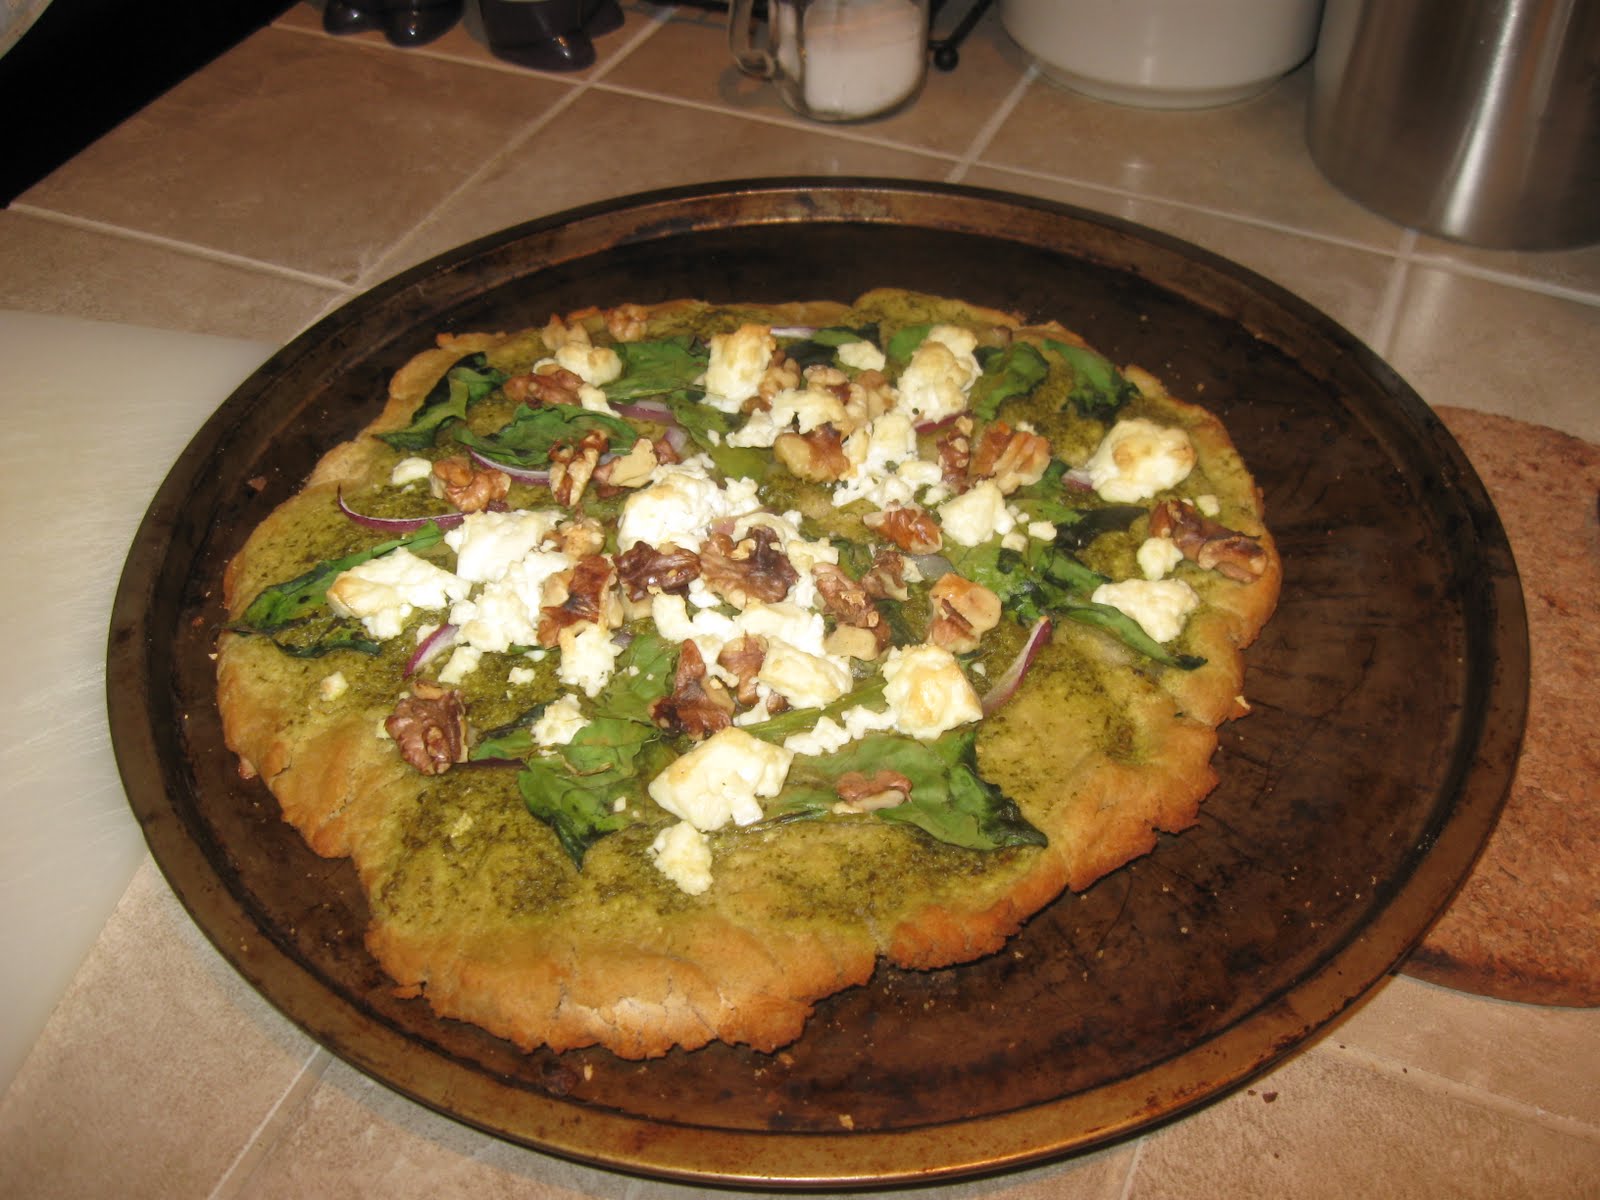
The finished product used for a spinach, feta, and walnut pizza. Note the uneven edges because the pizza dough was pressed into shape:
Pizza Dough I
Makes enough crust for 2 medium pizzas
2 packages of yeast or 4.5 tsp
2 tsp sugar
2 cups warm water (around 110 degrees, so a little warmer than your temp)
3 cups Bob's Redmill All Purpose Gluten Free Flour
2 cups Sorghum Flour
1 cup Tapioca Flour
2 Tb Salt
2 Tb Olive Oil
First, combine the warm water, sugar, and yeast and very gently stir so the yeast doesn't clump too much. Do not add the salt because it will kill the yeast. Wait about 5-10 minutes for the yeast to activate and start foaming. Combine all of the dry ingredients and then pour in the water, sugar, and yeast mixture. Stir with a spoon. Once it becomes hard to stir, put in the oil and knead by hand. Once the dough is kneaded, put it in an oiled bowl and cover with plastic wrap and a towel and put in a warm place. Let it sit for about an hour, or until the dough roughly doubles in size.
The dough will double in size, here's the dough before I let it rest:

I put it on a warm stove I was baking scones in, and the dough rose pretty quickly. It's not as a dramatic raise as gluten dough:

The finished product used for a spinach, feta, and walnut pizza. Note the uneven edges because the pizza dough was pressed into shape:
Subscribe to:
Posts (Atom)