Search This Blog

Showing posts with label dessert. Show all posts

Monday, April 4, 2011

Vegan Marionberry and Chocolate Cheezcake


Vegan cheezcakes are so decadent that it's hard to tell you aren't having the real thing. They are very creamy, smooth (if one has the right type of blender), and all of my non-vegan friends love them. My brother has even requested them in place of a traditional birthday cake. One slice is usually a full meal. Cheezcakes are packed full of nuts, other fats, and a lot of sweetener, so I try to enjoy a slice as a rare treat. When I first started a vegan diet, I indulged much more frequently, but I've noticed that my body absorbs fat more readily now. It probably has something to do with adjusting to the diet because I've heard of several other people who started out on a "gourmet" raw vegan diet that was high in fat and had to dial way back over time after they adjusted.

Vegan cheezcakes are best made the day before you intend to serve them. They need time to firm up (although the "pudding" is also delicious). I don't like to call them raw because many of the nuts we have access to in the bulk section of grocery stores are pasteurized before making it to the store. The recipe is very close to those available in Sweet Gratitude, an uncookbook by Cafe Gratitude.


Marionberry Chocolate Cheezcake

Crust
1 1/3 c. almonds or hazelnuts
5 ounces date paste
2 ounces cacao powder
1 vanilla bean, scraped
pinch salt

Filling
3 cups soaked cashews
2 cups macadamia or cashew milk (Living Harvest Vanilla Hemp Milk may work)
3/4 c agave syrup
juice from 1 lemon
1 vanilla bean scraped
1/2 tsp cinnamon
1/4 tsp salt
2 TB sunflower lecithin
1/2 c cacao butter
1/4 c coconut oil

14 oz frozen Marionberries
2 oz cacao powder

Put the cashews in a bowl to soak. Pit around 15 dates and soak them in water for 20 minutes. Butter the sides of a spring-form pan with coconut oil. After the dates are done soaking, put them in a food processor with an S-blade until the dates stick together in a ball. Split the dates in half and add the nuts, salt and vanilla. After the nuts have broken down, add the rest of the dates and process until the mixture is crumbly, but will hold together if pressed.


Press the crust into the bottom of a spring-form pan. Add 6 oz of marionberries on top of the crust.


Put the coconut oil and cacao butter in a pan on the lowest heat to melt (as soon as it's melted, remove from the heat). Add the cashews, lemon juice, nut milk, agave, cinnamon, salt, and vanilla to a high speed blender. If you have a normal blender, you will need to soak the cashews for a couple hours, split the recipe for the filling in two, and process one batch at a time. Put the filling in a large bowl and use a hand mixer to combine sunflower lecithin and oils into the filling.


Put 2 cups of filling back in the blender with 8 oz of marionberries and mix until very smooth If you have a normal blender, you may want to have thawed berries and cook for a short time to soften, then strain out the seeds. Use the hand mixer to mix the remaining plain batter with the cacao powder. Pour the chocolate batter over the marionberries and smooth out the surface.


Add the marionberry filling over the top of the chocolate filling and smooth out the surface.


Add marionberries as a garnish if you would like.


Put the cheezcake in the freezer for 2 hours and then move to the fridge. Serve after the mixture has been able to set for a minimum of 8 hours.

In other news, Annie continues her vegan leaning tendencies. My husband came to pick me up from acupuncture and said, "Well, Annie sure is your dog! We were eating at a restaurant and she was a very good girl until someone came in with a big leather purse. She barked at it! Even when I calmed her down she was still growling at the purse from time to time." I won't encourage her behavior because I want her to be a reliable citizen, but deep down I think it's just a little bit awesome.

"Bon Appetit!"

Sunday, February 20, 2011

Gluten Free, Vegan Cinnamon Rolls


I feel bad I haven't taken the time to blog lately. Things have been busy and tiring (and fun!). Yesterday I dropped off some goodies for a bake sale and we had a small get together. I finally conquered the Snickerdoodle (YAYY!), which got rave reviews along with my lucuma banana cupcakes with vanilla icing. Today I went to discuss renting a commercial kitchen so I can attend farmer's markets on the weekends and potentially do some online sales. There is a lot to getting a baking business started....

There wasn't much leftover...I love how people try to
be polite and not take the last cookie, but people ended up
tearing pieces off

Today I decided to work on a business plan for the bakery and start perfecting more recipes. I have several that are market ready, but I could always use more (many more, preferably). I tend to try to bake the things I loved when I was younger. Cinnamon rolls are something my grandmother really excels at, and my brothers always beg her to make them. I decided to try my hand at them. Gluten free rolls are....not quite the same (at least not the rolls I've made so far). The dough does hold up to rolling for cutting, but it's soft enough that the cinnamon swirl loses its definition and I press into a rectangle rather than attempting to roll. I'm personally allergic to baker's yeast, but my husband tells me they are quite good. He's gotten to be a pretty reliable food critic, and although he isn't always very descriptive as to why he does or doesn't like something, I know I can trust his overall opinion.


Cinnamon Rolls

makes about 8


Rolls
1/2 c Teff Flour
1 c Brown Rice Flour
1/2 c Tapioca Flour
1 1/4 c Sweet Potato (cooked and mashed)
1/2 tsp salt
4 T melted Palm Oil
1/2 c water
2 T Yeast
1 T Maple Syrup


Cinnamon Filling

7 Medjool Dates
1/4 c packed Raisins
1/4 c Coconut Oil
1/2 t Cinnamon
2 T Maple Syrup
pinch salt

Preheat the oven to 375 degrees. Put the dates and raisins in water to soak and set aside. Warm a 1/2 cup of water to 110 degrees and add the maple syrup and yeast. If the water is the right temperature, you will see the yeast foam up within the first couple minutes. Combine the dry ingredients for the rolls and melt the palm oil. Add the yeast mixture and palm oil and fold into the dry ingredients. I end up getting my hands dirty to make sure things are well combined (be careful not to overmix/handle).

Drain the dates and raisins and put them in a food processor with an S blade until the dried fruit starts to form a ball (it should be close to a paste at that point). Put the mixture in a mixing bowl and combine the maple syrup, cinnamon, and coconut oil. Set aside.

Put a piece of parchment paper over a cookie sheet and work the dough into a large rectangle shape.


Put tablespoons of the date/filling mixture around the dough and GENTLY spread the mixture with a knife, being careful not to tear the dough underneath.


Once the mixture is evenly spread, roll the dough.


Score the dough and cut into even pieces, about an inch and a half thick.


Bake for 30 minutes or until a nice golden color:


Icing
2 T Palm Oil
1/2 T hot water
2 c Powdered Sugar - approximate
vanilla

Stir the palm oil and hot water together with a hand mixer, along with vanilla bean (1/2 a bean scraped or 1/2 tsp extract). Put 1.5 cups sugar in a fine sifter and sift the sugar. Combine the mix and continue to add sugar as necessary to achieve the right consistency. These measurements may be a little off - I tend to eyeball frosting.


Tuesday, January 25, 2011

Blueberry Upsidedown Cake


I am so excited to be blogging tonight. It's the first time that I've had a few quiet moments to spare.

Sunday was a busy day full of baking and family. I got up fairly early in the morning, fed the dog, cleaned the kitchen, and then started baking up a storm. I'm having a bunch of people over to taste test a bunch of my recipes, and I wanted to make some improvements. The day before I had made some chocolate chip oat cookies and snickerdoodles. I made the snickerdoodles with coconut oil instead of palm oil because we have a friend that has a palm allergy. I have to say palm oil works a little better in cookies. Coconut oil is great in cakes, muffins, and cupcakes though.

Snickerdoodles

thin oatmeal chocolate chip cookies

Next was a batch of Sweet Potato Donuts. A lot of my recipes have improved over time and I wasn't sure if I'd still be impressed with the recipe. It really didn't disappoint though. We don't often fry food. I used canola oil this time and filled a pan enough for the donuts to be completely submerged and cook evenly. I laid out a tray, put paper towels on the tray and then layered a wire cooling rack over the paper towels. It worked really well. I'll admit I made a big mess sprinkling powdered sugar on top with a wire fine mesh strainer.

Donuts on their cooling rack post powdered sugar -
the area was a mess after that sifting


Next up were Cinnamon Rolls. I'm told they are quite good, but I need to work on a thicker filling. This time I used date syrup and palm oil with a little maple syrup. I think next time I will be processing dates without soak water to make a paste.

Frosted Cinnamon Rolls

After the cinnamon rolls, I had a brilliant idea for a blueberry upside down cake. I put too much blueberry sauce in the pan on the first go and not quite enough the second time. Getting the cake to layer on top is a little difficult.


Messy - but tasty! - upside down cake

The neater version - the ideal is somewhere between the two

I also made some pretty decent dinner rolls to go with dinner. While Mom and I were getting dinner ready, the boys were having fun in the living room. Annie is absolutely obsessed with the laser light. Owen loves clicking the button to make the light turn on for the dog, but I have a feeling he doesn't completely understand what's going on....


Owen loves being at our house and whenever Lance was outside, he'd ask "Where Choo Choo??" Apparently, Lance is Uncle Choo Choo. After dinner, my family went home and I got a text message from Mom mid-trip. Owen got into the cookies and really liked how the doughnut fit on his finger like a little hat.

Last night my car broke down, so my evening was shot after work. I found out today that there's an issue with the fuel injectors. The cylinders aren't sealing completely, so the cylinders are flooding with fuel after the engine is shut off, making restarting it any time soon after running an errand impossible. After an hour and a half of letting it sit, I was able to drive it a quarter of a mile, but it was running so rough and smelled horrible, so I pulled in a gas station. Fortunately, Lance was in his car behind me and we were able to go home after the truck came. It was a long night.


Blueberry Upsidedown Cake


Blueberry Sauce/Topping
makes enough for 2 cakes
1 pint Blueberries (fresh is best)
1 tsp+ Orange Zest
1/4 c Sugar
1/3 c Coconut Oil
1 Cinnamon Stick - whole

Put the ingredients in a sauce pan and heat until the oil melts and the sugar dissolves.

Keep the cinnamon stick intact, and remove the stick and take off the heat once the mixture has come to a boil.


Maple Cake
makes 1 cake
1 c White Rice Flour
1/2 c Teff Flour
1/4 c Arrowroot Powder
2 tsp Baking Powder
1/4 tsp Salt
3/4 tsp Cinnamon
3-4 T melted Coconut Oil
2 T Chia seeds, ground
1/2 c Sugar
1/2 c Maple Syrup
1/2 tsp Orange zest
Appx 1/2 c. water

Preheat the oven to 325 degrees. Sift all of the dry ingredients together. Add the maple syrup, melted coconut oil, and then just enough water to get the batter to the right texture. It needs to be thick enough to sit on top of the blueberry mixture without mixing too much.

Bake the cake for around 40 minutes. The cake is done when you can insert a toothpick and it comes out clean. Run a knife around the side and push the cake in a little bit. Put a plate on top of the pan and flip the cake over. tap the plate and pan on the counter top a little until the cake falls loose.

Saturday, November 13, 2010

Vegan Mofo Day 13 - Chocolate Tease Cupcakes


This has been a recipe I have been toying around with for a while. My friend, Noble, is the creator of the original Chocolate Tease Banana Bread, which had milk, eggs, and gluten. She made a gluten free version that went over really well at a gluten free party we had. She sent me the recipe and I've been tinkering around with ingredients and ratios. I have 2 recipes from her original recipe - a loaf and a cupcake. I actually went around handing out samples to friends and family today throughout the day. It went over very well, and no one noticed the banana flavor, and there's only a slight hint of chocolate.


Chocolate Tease Cupcakes
1/4 c Olive Oil
2 ripe Bananas (the riper the better)
1/2 c Maple Syrup
3/4 c Water
1 scraped Vanilla Bean
1 tsp Cinnamon
3/4 c Brown Rice Flour
3/4 c White Rice Flour
3/4 c Teff Flour
3 Tb Tapioca Flour
1 tsp Baking Soda
1/2 tsp Salt
1 tsp Coconut Vinegar
1/3 c Enjoy Life Chocolate Chips

Preheat the oven to 375 degrees F. Combine the olive oil, maple syrup, bananas, water, vanilla bean, and cinnamon in a blender and blend until smooth. Combine the dry ingredients in a bowl and whisk to mix together. Add the liquid ingredients and stir until combined. Add the chocolate chips and coconut vinegar after you have put the cupcake liners into the cupcake pans (or alternatively greased and floured the cupcake pan) and the oven is ready. Bake for about 20-25 minutes, or until a toothpick comes out nearly clean. Overcooking will cause them to dry.

Straight out of the oven, these cupcakes are amazing. They dry out a bit after 24 hours, so it's best to enjoy them the day of baking if possible.

I am still working on a suitable frosting combination. Perhaps the maple chocolate would be tasty...although I am toying with spicing up a version and going with a chai frosting.

Tonight I have big plans. I want to make an apple pie, bake my pumpkin and brainstorm on what I am going to use that for (perhaps combine with a little carrot and apple in a thick soup?), and cook up some quinoa flat-bread for "sandwiches" and Brussels sprouts for dinner. I also want to get to my new vegan cookbooks...

Thursday, November 4, 2010

Vegan Mofo Day 4: Double Chocolate Cake with Peanut Butter Frosting

My husband's birthday is today, so I had to figure out a special cake for him. His favorite flavor combination is chocolate and peanut butter. We're both in a sugar coma right now, but everything, especially the frosting, tasted delicious.

Double Chocolate Cake
1 - 10" cake

3/4 cup Teff Flour
3/4 cup Tapioca Flour
3/4 cup Sorghum Flour
1 scant cup Cacao Powder
1 tsp Baking Soda
1/2 tsp Salt
1 cup Agave
2 large over ripe Bananas
1 scraped Vanilla Bean
1/2 cup Olive Oil
1/4 cup Water
1/2 cup Enjoy Life or other Vegan Chocolate Chips
1 tsp coconut vinegar

Preheat the oven to 350 degrees. Use a fine mesh strainer to sift the cacao powder to break up any large chunks. Combine all of the dry ingredients with a whisk. Combine the bananas, agave, olive oil, and water in a high speed blender and blend until smooth and creamy. Pour the wet ingredients into the dry ingredients and fold everything together with a spatula.

Put a little palm oil on a paper towel and wipe down the interior of a 10" cake pan. Put a little teff flour in the pan and rotate the pan, patting the sides to evenly coat the pan with a very light layer of flour. When your pan is ready and the oven is preheated, add the chocolate chips and vinegar to the batter, stir vigorously, and then pour the batter into the cake pan. Use a spatula to smooth the top of the cake.

Bake the cake for about 30 minutes, or until the middle of the cake is firm. A toothpick shouldn't come away completely clean because you want some moisture.


There is a slight hint of banana to the cake. If you do not like banana, you could easily add a little more cacao to mask the flavor. Banana, chocolate and peanut butter is a great combo, so we didn't mind (and honestly I think the peanut butter masks the flavor even more).


Frosting
Enough for a little more than 1 - 10" cake

1/2 cup palm oil shortening
1/2 cup "creamy" peanut butter
2 1/2 cups powdered sugar*
2 TB hot water

Put all ingredients in a mixing bowl and add the hot water. Combine with a hand mixer until it is smooth.

*Vegan and Allergy Note: Not all sugar is vegan. Many manufacturers use bone char during processing to make the sugar white and use the bone char as a filter. I run turbinado sugar through a blender to make powdered sugar, although the texture isn't always perfect and doesn't add to the presentation (it's a little lumpy, as you can see in the picture). Wholesome Sweeteners produces sugar without bone char, but they add 3% "corn starch or tapioca starch" to their powdered sugar. If it were just tapioca, I'd consider it, but I'm very allergic to corn. Trader Joe's has powdered sugar with tapioca starch, but it's not on their vegan safe list. Looks like I'm sticking to the blender, but I'll keep checking labels.

I am going to go have a cup of tea and some miso soup to help balance out the sugar swirling through my system. I need to get some sleep so I can go to work tomorrow.

Wednesday, November 3, 2010

Vegan Mofo Day 3: Raspberry Chocolate Cups


I have the great fortune of having grandparents who are very aware of the consequences of using herbicides and pesticides. They have beautiful lake front property and a decent portion of the property is dedicated to gardening. They have rows upon rows of organically grown raspberries, and us grandkids are always welcome to take as much as we can pick. Is it greedy to take 6 buckets home at a time? Not if it's only a couple rows worth!

Lance and I use a lot of fresh raspberries in smoothies, peach raspberry pie, cookies, sprouted buckwheat cereal with hemp milk and raspberries, and in sauces to go over crepes, waffles, pancakes, and muffins. We still freeze the majority and usually have enough to last the year. This year's crop was not as good due to the uncharacteristic amount of cold, rainy weather we got from April on. I am trying to pace our raspberry consumption, but it's really hard to hold back! My grandparents have had these plants for well over 30 years - I'm not sure how long they have been cultivating and expanding their raspberry patch, but I know they've been around at least as long as I have. The dogs love them just as much as we do, and it's always funny to see their bums poking out of a bunch of stalks - and in Bogey's case (their 130 pound Bernese Mountain Dog), the poor stalks get mauled and he often turns around to look at us while chewing on half the stalk, leaves and all. He must know they are a great source of vitamin C.

Raspberry Filling
1 cup Raspberries (frozen is fine)
5 pitted Medjool Dates
1/4 cup water
1 TB Chia Seeds

Add the raspberries, dates, and chia seeds into a high speed blender. The chia seeds will help thicken the sauce. If you do not have a high speed blender, blend the chia seeds in a coffee grinder or spice blender before adding them to the blender. The water should be the smallest amount possible - just enough to get the blades to keep turning things over in the blender. Use the tamper tool to help things along. This is more filling than required for the chocolate recipe. I used my leftover filling in smoothies the next morning.

Chocolate
3.5 oz cacao butter
1.5 oz cacao powder
3 oz agave

I melt the cacao butter over the lowest heat possible on my stove top, periodically taking the pan off the burner so the temperature doesn't get too high. If you are trying to obtain a food that is closer to raw, I suppose you could melt the cacao butter in a food dehydrator over several hours at the appropriate heat. I honestly don't have the patience, and the fact that it is questionable how raw cacao is due to fermentation after harvest makes me less anxious about conserving time and energy on my part using the stove top at a very low heat. Once the cacao butter is melted, I take the sauce pan off the heat and combine the rest of the ingredients, stirring often and vigorously so the agave combines properly with the rest of the chocolate. This chocolate recipe is from a previous post, so feel free to double the batch to help use up more of the filling.

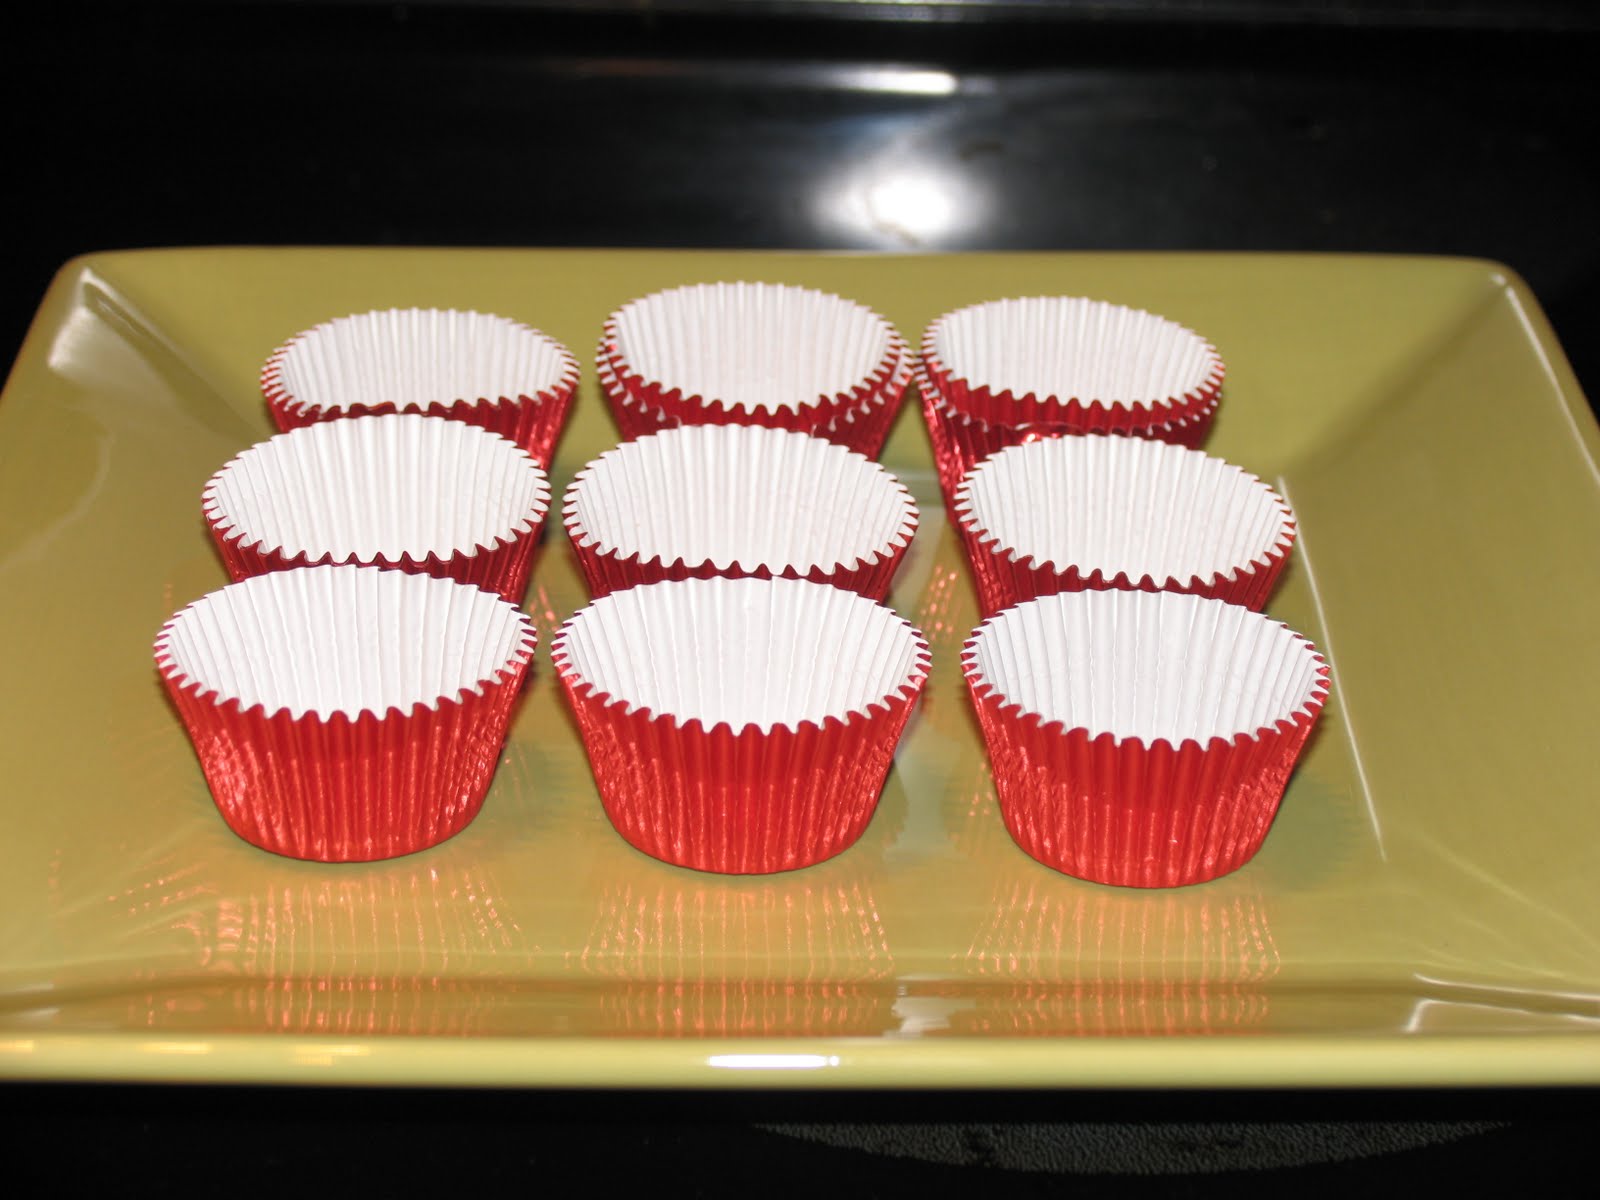
I didn't have chocolate molds, so I just used mini cupcake papers. Spoon about 1 TB of chocolate into the bottom of each cup, or enough to coat about 1/3 of an inch. Add a teaspoon of filling to each cup to form the raspberry center:


Add at least another tablespoon over the top of the filling to create a flat surface on top of the candy.

Put the cups into the fridge to harden. I took a couple cups to work with me the next morning and left them out for several hours without a melting issue. These will melt in warm weather (ever forgotten a chocolate bar in the car? yuck). I recommend storing them in the fridge for less risk of a mess. They are a little messier to eat than highly processed chocolate that has a lot of additives and texture aides, but it's so worth it!

The finished product after chilling.

Monday, November 1, 2010

Vegan MoFo and Chocolate "Cheesecake"

It is Vegan Month of Food, so I am going to do my best to post a recipe per day! It's going to be hard to come up with new recipes every day, so I may have to resort to a few vegan food and restaurant reviews. I didn't officially sign up in the blog roll, but I'm more than happy to contribute!

Vegan food can be absolutely delicious and indulgent. The most decadent foods I have ever experienced have been raw vegan. The desserts are rich and creamy without the dreaded sugar crash/hangover. So to kick off the month, I am going to introduce (or reintroduce those raw vegans out there) the raw vegan cheesecake. The chocolate "cheesecake" I have made in the past was so well received by my non-vegan family members that they requested the "cheesecake" in lieu of their "real" birthday cake (and in my family, that is an accomplishment to be proud of). I will contribute to more sustainable and healthful eating however I can and take those small wins.

Chocolate Cheesecake with Raspberry Sauce


Crust:
8-12 pitted medjool dates
1 cup soaked hazelnuts
1/2 cup shredded coconut
1/4 cup cacao nibs
1 vanilla bean, scraped
1 TB Orange Zest

Pulse the hazelnuts until they are broken into small pieces (not a flour, but smaller than gravel). Add the coconut, cacao nibs, zest, and vanilla bean and pulse a couple times to combine. Turn the processor back on and drop in the dates one at a time, until they are well combined and the mixture forms into a ball. Press the "dough" into the bottom of a spring-form pan.

Filling:
3.5 cups soaked cashews or macadamia nuts
1.5 cups water
1 cup agave
2 vanilla beans scraped
1/4 tsp salt
3 Tbs finely ground chia seeds
3/4 c cacao powder
1/2 c melted cacao butter
1/3 c melted coconut oil


Blend the soaked nuts, water, agave, vanilla bean, and salt until smooth in a high power blender. This may take a couple minutes. My Vitamix wasn't turning quickly enough for my taste after this was all combined (I am so impatient), so I poured out the smooth batter and added the ground chia seeds and cacao powder with a hand mixer. After the chia and cacao are very well combined, slowly add the oils while the mixer is on low to low-medium.

Pour into the springform pan over the crust and put on a flat surface in your freezer. The batter needs to chill for 2 hours in the freezer and then overnight (or at least 3 hours) in the fridge for it to have that cheesecake texture. This is definitely something I make the day before.

Raspberry Sauce
2 c. raspberries
5 dates
Combine in the food processor. You can add more dates if you feel this combination isn't sweet enough.

Wednesday, October 20, 2010

Vegan, Soy-Free Chocolate Peanut Butter Cups


Chocolate is packed full of anti-oxidants and is actually quite the little super food IF you don't have all the processed sugar, milk, and other ingredients that often throw this food into the junk food category. It's really quite a shame. Fortunately, there are plenty of healthy ways to enjoy delicious chocolate.

Lance loves chocolate and peanut butter, so I decided to make this with real peanut butter (ingredient = peanuts only). To make a raw version of this treat, use raw almond butter or another raw nut butter instead. You know you have good peanut butter when the oils separate. This means many of the preservatives and stabilizers haven't been added to the peanut butter and it's just gooey goodness.

This recipe calls for cacao products - not premade chocolate. Cacao is the unprocessed precursor to chocolate in its original state. Some people argue that cacao is not raw because it exceeds 115 degrees and ferments after harvest, but there are enough benefits from indulging from time to time that I still kept it in my diet when I was extremely high raw vegan.

Chocolate Peanut Butter Cups
makes about 16 cups that are 1.5 inches in diameter and about 1/2 an inch high
3.5 oz cacao butter
1.5 oz cacao powder
3 oz agave
several 1/2 tsp of peanut butter
Tiny cupcake or foil cups to hold the chocolate

I used a small sauce pan and slowly melted the cacao butter over the lowest heat possible. If you are trying to make this as raw as possible, you can put the cacao butter in a food dehydrator over several hours to slowly melt the "butter" or you can use a thermometer. I frankly don't have that much patience.

Once the cacao butter is melted, add the agave and cacao powder and stir very well. Use a teaspoon to spoon chocolate into the bottom of the foil cups. You want it to be about 1/3 of an inch or more thick on the bottom.

Stir between chocolate cups so the agave doesn't settle on the bottom. Then add a small amount of nut butter into each cup. Then spoon enough chocolate to cover the nut butter.

Let chill to set in the fridge for at least 30 minutes.

Sunday, October 10, 2010

Pumpkin Pie with Pecan Crust


Have I mentioned how much I like the flavors of fall yet? I'm sure I have, but let me reiterate - the earthy tones of fall just agree with me. There's nothing really dainty about apple and pumpkin, and you can combine them with some really strong spices. I don't have to worry about being heavy handed - except when it comes to cloves I suppose. I really am sensitive to cloves and prefer they be used sparingly, if at all.

Prepping the Pumpkin

Lance picked out a very nice sugar pumpkin at PCC for me. There are several types of pumpkin that lend well to baking, but the big pumpkins that are cheap and used for jack-o-lanterns are not a variety that will work. They are too fibrous and dull. The smaller pumpkins can have some really full, buttery flavors. Here is a great link with everything you could want to know (really) about pumpkin varieties:
http://www.allaboutpumpkins.com/varieties.html

We used the Baby Pam, I'm pretty sure. Lance hacked it in half for me, we de-seeded and took the slimy fibers out, then Lance cut it into several good sized chunks. I laid the pieces, flesh side up, on a baking pan and covered it with tin foil to keep some of the moisture in. In retrospect, a bit of water would have been a very good thing (2 cups at least). Set the oven at 400 degrees and cook for 45 minutes or until the flesh can be pierced with a fork. I've put butter and sugar on the pumpkin as it roasts in the past, but it's really not necessary especially considering none of it is going to be eaten as is.

Because I didn't use water when I roasted the pumpkin, the food processor had a time cutting up the tougher, dry edges, and I had to add a decent amount of water to get the food to turn in the food processor. It all worked out though and I ended up with about 4 cups of pureed pumpkin (enough for 2 pies or 1 pie and a baking project, muaahaaha).


Pecan Pie Crust
makes one standard pie crust, bottom only
3/4 cup ground pecans
1 1/2 cup sorghum flour
1/2 tsp salt
1/2 cup plus 2 Tb palm oil shortening
1/4 cup agave

Combine the pecan and sorghum flours and salt. I just pulsed pecans in a food processor until they were fine enough for a flour - nothing fancy. Add in the palm shortening and agave and use a pastry cutter to combine the flour. When you pinch some dough and it clings together, it's ready to sit in the fridge for 1/2 an hour to an hour to rest.

Pie crust is a difficult thing to approach without a gluten binder, especially if it's vegan and you can't rely on eggs. It's important to handle it very little so the fats don't get too warm. This crust holds up quite well and keeps its form. Like all gluten free vegan crusts I've worked with thus far, it does not roll out. I pressed it into the pie pan.

Quick baking tip - cover the edges of crust that are exposed during baking with aluminum foil to prevent burning. The rest of the pie has moisture from the filling it can collect, but the edges are exposed and will burn.

Pumpkin Pie Filling

Date Syrup

20 deglet dates, soaked in water for at least 45 minutes
1/3 cup soak water
pinch of salt
1 vanilla bean, scraped

Combine the date syrup ingredients in a high speed blender. It should have a caramel taste almost. Deglet dates are lower in sugar and higher in fiber than most varieties, so it shouldn't be overwhelmingly sweet. If you use Medjool dates, only use about 10. They are much higher in sugar content. Honey dates are supposed to be good as well, but I haven't seen any in Washington - Deglet and Medjool seem to be the two varieties.

Pour the date syrup into a food processor along with the remainder of the ingredients:

2 cups pumpkin puree
2 TB tapioca flour (in just enough water to make the mixture smooth - 2 TB water)
1 1/3 tsp cinnamon
1/3 tsp ginger
1/8-1/4 tsp fresh grated nutmeg
pinch cloves
1/4 cup maple syrup
1/2 tsp salt

Once all of the ingredients are combined, poke holes in the bottom and sides of the pie crust with a fork. Pour the filling into the pie crust and bake at 350 for about 40 minutes. The filling will firm up nicely and should not ripple when you move the pan to check on it.
Serve warm with Vanilla coconut ice cream.

Teff & Sweet Potato Donuts

I think my new favorite ingredient is teff. I hadn't worked with it much, but recently I have been using it to convert some recipes, and I really like the texture and molasses undertones it lends to recipes. Some people consider it sour and it has a strong taste, so I tend to use it as a one-fourth of the flour volume or less. It creates a beautiful dark brown color, and retains moisture really well if you combine things properly. Like most gluten free banana breads, it seemed to settle down and hold much better as day old, although it was delicious as a melty crumble the day of.

Chocolate Banana Tease Bread - note the rich color

Like quinoa, teff has all 8 of the essential amino acids, which would be considered a complete protein. It is very high in fiber, iron, and calcium. It was almost exclusively grown in Ethiopia, but it is catching on in popularity. There is a farm that grows quite a bit in Idaho, so it's fairly easy to find in the Seattle area.

Teff is considered a gluten free grain, but it does contain a form of gluten. It just doesn't have the chain considered to activate celiac/gluten intolerance in people. Both my husband and I seem to do fairly well with it. If it does have gluten, it's not enough. I tried to make a soda bread with it recently, and it was not pliable at all and turned into a powdered mess. Trial and error seems to be my cooking method of choice, and not everything is a home run.

Yesterday, my mom and grandparents came over for a nice big dinner. I have been sick lately and was getting cabin fever, so I was glad they all came over. We had plenty of vegan sides to go with their meat (I stuck to the sides). I had my pea salad with macadamia dressing, lightly blanched broccoli, sweet potatoes, and a nice vegan pumpkin pie with coconut ice cream. It was a very filling dinner. Surprisingly, I actually showed some restraint this time and didn't cook enough for an army, so leftovers were limited. I had about a cup and a quarter of sweet potatoes left over and wasn't sure what to do with them. I've made sweet potato pancakes that are always a hit, but I wanted something different. I settled on pan fried doughnuts. It sounds very unhealthy, but we rarely have anything fried.

Sweet Potato Donuts

1/2 cup teff flour
1 cup brown rice flour
1/2 cup tapioca flour
1 1/4 cup sweet potato (cooked and mashed)
1/2 tsp kosher salt
1 tsp baking soda
1/4 tsp fresh grated nutmeg
4 Tb melted palm oil (Spectrum Shortening is the brand I used)
1/4 cup water
1 tsp vinegar

Toppings:
powdered sugar (corn starch free)
or
granulated sugar and cinnamon

Combine all of the dry ingredients thoroughly with a whisk. Mash in the sweet potatoes with a fork or pastry cutter until it resembles pie dough (pea sized clumps). Melt the palm oil and combine that with the water and vinegar and then combine the wet ingredients with the dry ingredients.

My sweet potatoes were fresh out of the fridge, so it helped temper the palm oil. If everything you start with is at room temperature or warmer and the dough is hard to work with, stick it in the fridge for 30 minutes. You should be able to form a snake or length of dough with your hands really easily. Connect the ends of the dough to form a doughnut shape. I made mine really small because I was pan frying them instead of deep frying. I used peanut oil, but you can use whatever high temperature oil works best for you. Vegetable oil is usually soy and corn, and I am terribly allergic. If you are deep frying them, watch for them to get a nice dark golden color. If you are pan frying, just cook them a few minutes on each side, and be careful to only flip them once. You should notice the side start to turn a golden color before flipping them.


Once they were done cooking, I put them on a drying rack over a sheet pan with raised sides so the oil would drain off. If you put them on paper towels, you will end up with a mess. I didn't have much oil, so I flattened the rest of the batter and made naan bread for my dinner tonight (yum!). This is a versatile recipe, and I may find other uses or variations down the road.

I put 1/4 cup of turbinado sugar in the Vitamix blender and let it whir and ended up with some nice powdered sugar. I strained that over the top with a fine sieve. You could also roll them in granulated sugar with cinnamon while they are fresh out of the pan, but I prefer them with very little sugar for a hint of sweetness.

Monday, October 4, 2010

Lemon Cake

Please note that you will want to use shredded yellow squash, not pureed, baby food or pre-cooked. My mom thought pureeing the squash would give the cake a better texture, but the cake sank. Even my friends with a texture food phobia thought the texture of this cake is very good. I like the old adage, "If it ain't broke, don't fix it."

I like using yellow (crookneck) squash because the color blends in very well with the batter. I prefer the squash without bumps in the skin, but you can peel those off. If you can't find the proper kind of squash, you can substitute with zucchini, although I would probably peel off the skin.

Lemon Cake
makes one 10" cake
1 cup brown rice flour
3/4 c sorghum flour
1/4 c tapioca flour
1 1/2 cup sugar (or 1/2 cup turbinado sugar and 1/2 cup agave)
1 vanilla bean, scraped
1 1/2 tsp baking soda
1 tsp salt
1/2 cup olive oil
2 cups shredded yellow squash
1 lemon, zested and juiced

Combine the dry ingredients in a bowl. In another bowl, combine the squash with the wet ingredients. be sure to add in the lemon zest and juice. Combine the liquid and dry ingredients by folding in the squash mixture. This will be a drier than normal cake batter. The squash releases liquid as the cake cooks in the oven and it comes out quite moist. Because the cake doesn't have eggs, feel free to try a very small amount of batter. If there isn't enough lemon flavor, zest half of another lemon into the cake batter.

Bake at 350 degrees for 25 minutes, or until a toothpick comes away mostly clean. You don't want to overcook this cake and a little extra moisture is better than too little.

Monday, September 6, 2010

Peach Rasberry Pie


This pie is delicious and can be made in about 20 minutes. I do recommend you make the crust a bit ahead of time and put it in the fridge to firm up a bit. The pie was one of my first raw vegan creations. My sister in law literally licked her plate clean the first time she had this dish. The great thing about this desert is it isn't too terribly heavy with nuts and it leaves you feeling light and satisfied.

Peach Raspberry Pie

3 peaches cut into segments
2 cups of raspberries
3 TB agave
10 medjool dates
1 cup cashews
1/2 cup shredded coconut
1 vanilla bean, scraped
1/4 tsp salt
2 TB water

To make the crust, put the cashews, vanilla, salt, and coconut in the food processor and pulse with an S-blade until the cashew pieces are mostly broken up:

Add 8 pitted dates, one at a time. Once the dates are combined, add the 2 TB of water and mix until the "dough" forms a ball:

Sprinkle shredded coconut on the bottom of the pie pan and press in the pie crust. I recommend letting the crust set in the fridge for a good 30 minutes.

Peel and cut the peaches into nice sized wedges and arrange on the pie crust.

Put the raspberries in the food processor with an S-blade and combine with 2 dates and 3 TB of agave nectar. Alternatively, you can just combine the raspberries with 4 dates and have a thicker raspberry sauce. Pour the sauce over the peaches before serving.