Search This Blog

Showing posts with label breakfast. Show all posts

Saturday, June 18, 2011

Quinoa Pear Hoecakes


A friend of a friend sent me an intimidating list of allergens her son has to avoid. Fortunately, I've had either personal experience with them or I have had to feed my husband or nephew while avoiding those foods. The challenge is usually coming up with pancakes, waffles, or some kind of grain based breakfast item that has a good texture and holds together well without using corn, rice, or potato starch. These pancakes remind me much more of hoecakes, which are traditionally made with cornmeal, giving it a more interesting texture. They are also straddling the line between savory and sweet. Quinoa is very savory, and the only sweetener in this batter is pear puree. This could easily be converted into a versatile flat bread that would go well with savory beans or a bean puree and al dente vegetables.

Pear Quinoa Hoecakes
Makes over 10 small hoecakes (1 1/2" diameter)
1 Pear, pureed
1 Pear, julienned
3.5 oz Quinoa, ground
3.5 oz Sorghum flour
1 oz Tapioca flour
1 Tb Chia seeds, ground
1/2 tsp Baking Powder*
1 tsp Baking Soda
1/2 tsp Salt
3 T Safflower Oil
4 oz Hemp Milk
1 tsp Apple Cider Vinegar

* Baking powder is something that should be purchased with some research and caution. Many mainstream baking powders have either corn or gluten in them. Hain Baking Powder is the brand I usually use, but it has potato starch in it. You could alter the recipe to 1 3/4 tsp baking soda and add a little more vinegar instead of using Baking Powder.

I used pear in this recipe as a binder, sweetener, and to add some texture and moisture. If you do not like the texture, feel free to skip julienned pear and puree it instead. Another option is to substitute with baking apples like McIntosh. McIntosh are soft apples that tend to lose their structure a bit during cooking, which is what you actually want here, as opposed to eating apples like Fuji. To julienne the pear, I halved and cored the pear, then cut into fine "sticks."


Quinoa flour can be quite expensive, so I buy my quinoa in bulk and use a cheap coffee grinder to make my flour. The flour is a bit course compared to store bought quinoa flour, but this isn't a bad thing for most dishes. The course grind is what gives this the texture of a hoecake.


Combine the dry ingredients and mix well. Add in the pear puree, julienned pear, safflower oil, hemp milk, and apple cider vinegar once your skillet is up to temperature. Gently fold in the wet ingredients if you want to find some pear in your hoecake, otherwise mix away! I put in enough oil to keep an ample coating in the pan - on the verge of pan frying the bottom of the cake a bit. Flip the cakes when they begin to bubble and appear cooked around the edges. You may have to work around the bottom of the cake gingerly before flipping them to keep their slightly crispy exterior intact. I use a ceramic pan instead of teflon, and have noticed things tend to stick more as my pan ages. I feel it's worth having a non-teflon pan.


The amount of oil I recommend along with keeping the hoe cakes small will keep you from cursing my recipe and your frying pan. I learned this the hard way and was about ready to give up on the recipe. I'm very glad I kept at it because Lance and I really enjoyed them!
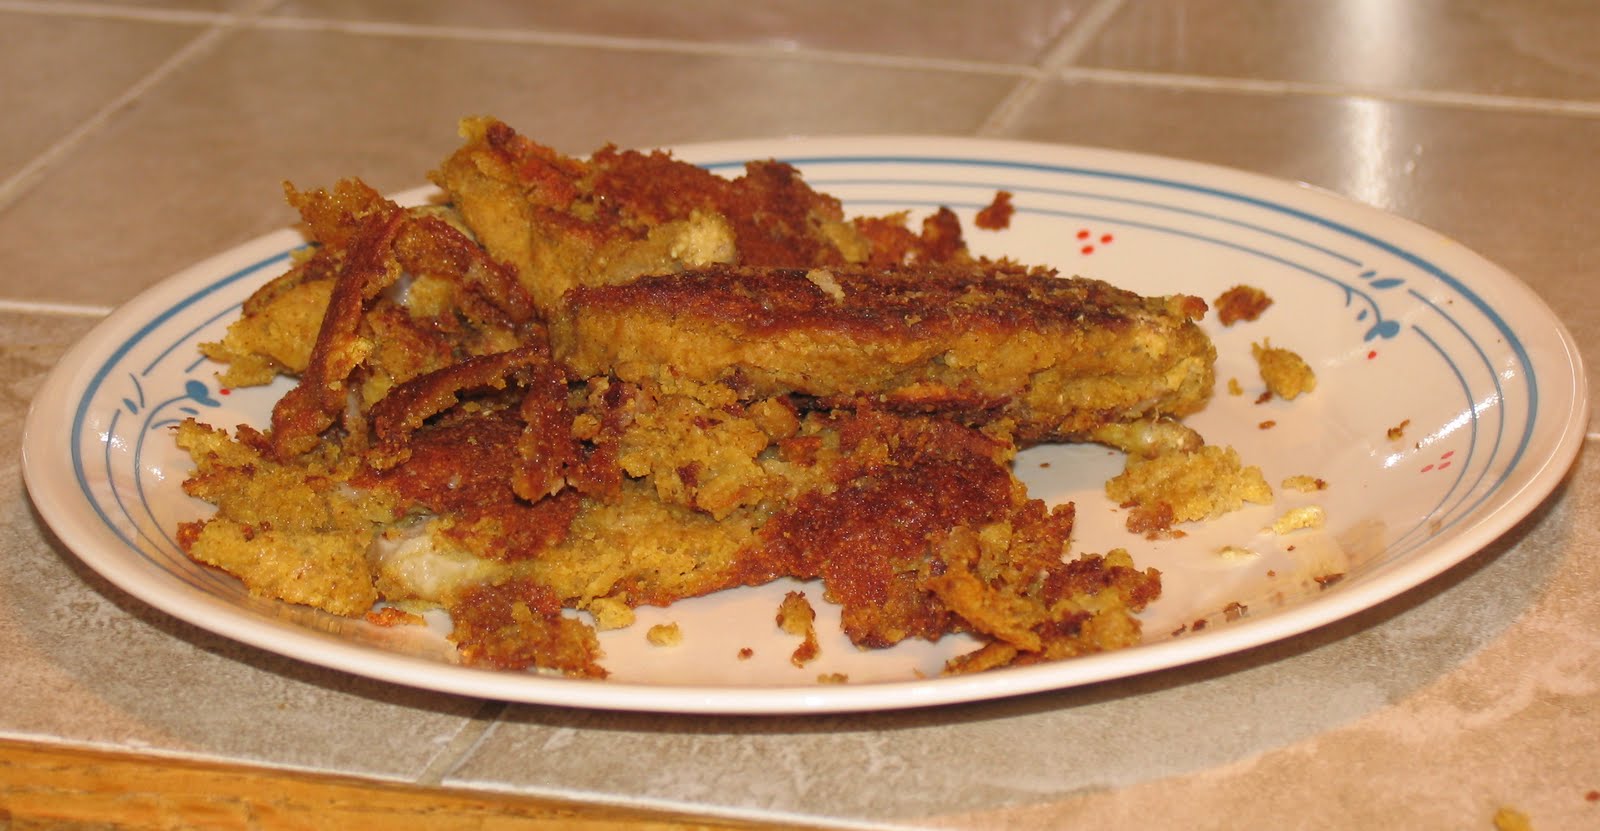
At first I thought this recipe was a failure.

Once I adjusted the oil and made smaller cakes, they turned out great!
These cakes can be served several ways. Because they are a bit savory, I added a little powdered sugar. I enjoyed mine with a drizzle of molasses, which is a great source of potassium, calcium, and iron. Lance enjoyed his with powdered sugar and strawberries, although they'd be fine with maple syrup.

Molasses has a very distinct flavor, but it's rich in Iron

If you want a savory cake, I would use one pureed pear or apple, skip the julienned addition and add chopped scallions to the batter.

Are there breakfast items you miss because of a diet change or allergy?

Sunday, February 20, 2011

Gluten Free, Vegan Cinnamon Rolls


I feel bad I haven't taken the time to blog lately. Things have been busy and tiring (and fun!). Yesterday I dropped off some goodies for a bake sale and we had a small get together. I finally conquered the Snickerdoodle (YAYY!), which got rave reviews along with my lucuma banana cupcakes with vanilla icing. Today I went to discuss renting a commercial kitchen so I can attend farmer's markets on the weekends and potentially do some online sales. There is a lot to getting a baking business started....

There wasn't much leftover...I love how people try to
be polite and not take the last cookie, but people ended up
tearing pieces off

Today I decided to work on a business plan for the bakery and start perfecting more recipes. I have several that are market ready, but I could always use more (many more, preferably). I tend to try to bake the things I loved when I was younger. Cinnamon rolls are something my grandmother really excels at, and my brothers always beg her to make them. I decided to try my hand at them. Gluten free rolls are....not quite the same (at least not the rolls I've made so far). The dough does hold up to rolling for cutting, but it's soft enough that the cinnamon swirl loses its definition and I press into a rectangle rather than attempting to roll. I'm personally allergic to baker's yeast, but my husband tells me they are quite good. He's gotten to be a pretty reliable food critic, and although he isn't always very descriptive as to why he does or doesn't like something, I know I can trust his overall opinion.


Cinnamon Rolls

makes about 8


Rolls
1/2 c Teff Flour
1 c Brown Rice Flour
1/2 c Tapioca Flour
1 1/4 c Sweet Potato (cooked and mashed)
1/2 tsp salt
4 T melted Palm Oil
1/2 c water
2 T Yeast
1 T Maple Syrup


Cinnamon Filling

7 Medjool Dates
1/4 c packed Raisins
1/4 c Coconut Oil
1/2 t Cinnamon
2 T Maple Syrup
pinch salt

Preheat the oven to 375 degrees. Put the dates and raisins in water to soak and set aside. Warm a 1/2 cup of water to 110 degrees and add the maple syrup and yeast. If the water is the right temperature, you will see the yeast foam up within the first couple minutes. Combine the dry ingredients for the rolls and melt the palm oil. Add the yeast mixture and palm oil and fold into the dry ingredients. I end up getting my hands dirty to make sure things are well combined (be careful not to overmix/handle).

Drain the dates and raisins and put them in a food processor with an S blade until the dried fruit starts to form a ball (it should be close to a paste at that point). Put the mixture in a mixing bowl and combine the maple syrup, cinnamon, and coconut oil. Set aside.

Put a piece of parchment paper over a cookie sheet and work the dough into a large rectangle shape.


Put tablespoons of the date/filling mixture around the dough and GENTLY spread the mixture with a knife, being careful not to tear the dough underneath.


Once the mixture is evenly spread, roll the dough.


Score the dough and cut into even pieces, about an inch and a half thick.


Bake for 30 minutes or until a nice golden color:


Icing
2 T Palm Oil
1/2 T hot water
2 c Powdered Sugar - approximate
vanilla

Stir the palm oil and hot water together with a hand mixer, along with vanilla bean (1/2 a bean scraped or 1/2 tsp extract). Put 1.5 cups sugar in a fine sifter and sift the sugar. Combine the mix and continue to add sugar as necessary to achieve the right consistency. These measurements may be a little off - I tend to eyeball frosting.


Friday, December 24, 2010

Gluten Free Pancakes and Poinsettias


Air bubbles = fluffy goodness!

This morning I woke up determined to start gathering another stockpile of recipes to use during my baking adventures, but first I wanted to measure out a Pancake recipe. It's much easier to replicate any recipe with weights, but with gluten free it seems to be particularly important.

This recipe is filling and the pancakes are fluffy. They are flavorful without tasting too "whole grain." I know a recipe is good if Lance gets seconds. If he goes back a third time, it's one I can prepare for non-gluten free friends.

Pancakes

8.5 oz Bob's Redmill All Purpose Flour
1.5 oz Teff Flour
1.5 oz Potato Starch
1 tsp baking powder*
1.5 tsp baking soda
1 tsp cinnamon
3 TB ground chia seeds
1/2 tsp salt
1.5 oz melted coconut oil
1 tsp apple cider vinegar
1.5 oz Agave

Mix all of the dry ingredients together thoroughly, including the ground chia seeds. Add in the liquids after your frying pan is preheated and mix thoroughly. Put a little coconut oil in the pan (easiest way is to put a little on a paper towel and rub the entire surface to coat evenly). Flatten the batter out a bit with the bottom of a ladle or a spatula. The chia seeds and teff makes the batter sick together very well. Once the batter starts to bubble, it's time to flip. The pancakes really puff up, so I poke a couple holes in the pancake after I flip them.

A few variations:

Add 1/2 cup of Enjoy Life vegan chocolate chips
OR
Add 1/2 cup blueberries, raspberries, blackberries, or a combination of all 3
OR
Add in slices of banana
OR
Use the pancakes as bread for a peanut butter and jelly sandwich

*Baking powder often contains gluten or corn. Make sure to research your brand. I use Hain Baking Powder which has potato starch instead of corn starch.

Annie is helping me type this out...I'm surprised she hasn't attacked my cup of raspberry tea with vanilla hemp milk. I better wrap this up because we are busy getting the house ready today. My family is coming over this evening and I get to have a little helper in my kitchen! Baby "O" is going to help me with my gluten free cookie recipes. He has a lot of allergies, but he can eat the food I make and because it's vegan, it's not dangerous if starts to gnaw on some before I can get them in the oven.

Photo from Teleflora.com

Just a quick note about Poinsettias. I found it quite interesting to read that they are not nearly toxic as rumored. If animals or people eat the plant, especially the sap, they will become nauseated and have gastrointestinal distress, but it's considered more of an irritant than a toxin. According to Snopes.com, the plant got a bad wrap when it was rumored a popular politician's young child died after consuming the plant. The rumor had spread too far to be contained before the medical examiner's office had the chance to contradict the statement.

Sunday, November 21, 2010

Vegan Mofo Day 21: Carrot Breakfast Risotto

Today is a cold one in Seattle. As I'm sitting here typing, little snowflakes are going by the computer room window. Fortunately, it doesn't seem to be sticking. I know that snow doesn't mean I get to miss out on making the trek into work, and I really don't want to have to mess with chains or the bus. I'd love it if the weather fit my schedule - let it snow as much as it wants next week when I have a few days off.

The pink blur is Annie in her little jacket
Cold weather doesn't make Annie slow down. She just wants to chase her ball up and down our hallway or in the backyard with Lance and Champ. Champ is a much more mellow dog and just sniffs around the yard.

About a week ago, I purchased 15 pounds of carrots. I had ambitions of soups, salads, risotto, and more. I would pick some out of the bunch during the week, but the majority of them sat in my fridge. This weekend I thought a breakfast risotto sounded really nice, so I finally got around to soaking the carrots (and an apple for the risotto) in a water and vinegar bath. It's about 1/4 cup vinegar to 1/2 a gallon of water. This bath helps get some of the bacteria, pests and residue off the surface. Apples are on the dirty dozen, the list of foods that are the most contaminated with pesticides when not organically grown. There are more than 42 recognized pesticides found on conventionally grown apples. Carrots were just recently taken off the list this year, but that doesn't mean you shouldn't purchase them from the organic section; it means the fruits and vegetables on the list this year have more than the 26 pesticides found on carrots (yikes). For more info on the dirty dozen, visit this link


I have a Jack LaLane Power Juicer I purchased around 6 years ago, well before I had ambitions of becoming a health nut and vegan. It works pretty well, but like all juicers, it's hard to clean after being assaulted with 10 pounds of carrots. It handled the carrots like a champ, and I was able to get a full cup of juice out of one Fuji apple. Not bad.


After juicing the carrots, I started food prep for the risotto and put the rest in the fridge to be used later today for a butternut carrot squash and raw vegan carrot soup.

Carrot Breakfast Risotto
serves 2 hungry people
2 Tb Olive Oil
1 cup Arborio Rice
1/3 cup Hard Apple Cider (gluten free)
2 1/2 cups Carrot Juice
1 cup Apple Juice
1 stick Cinnamon
2 generous slices fresh Ginger
1 cup Vanilla Hemp Milk
pinch salt
Maple Syrup for serving

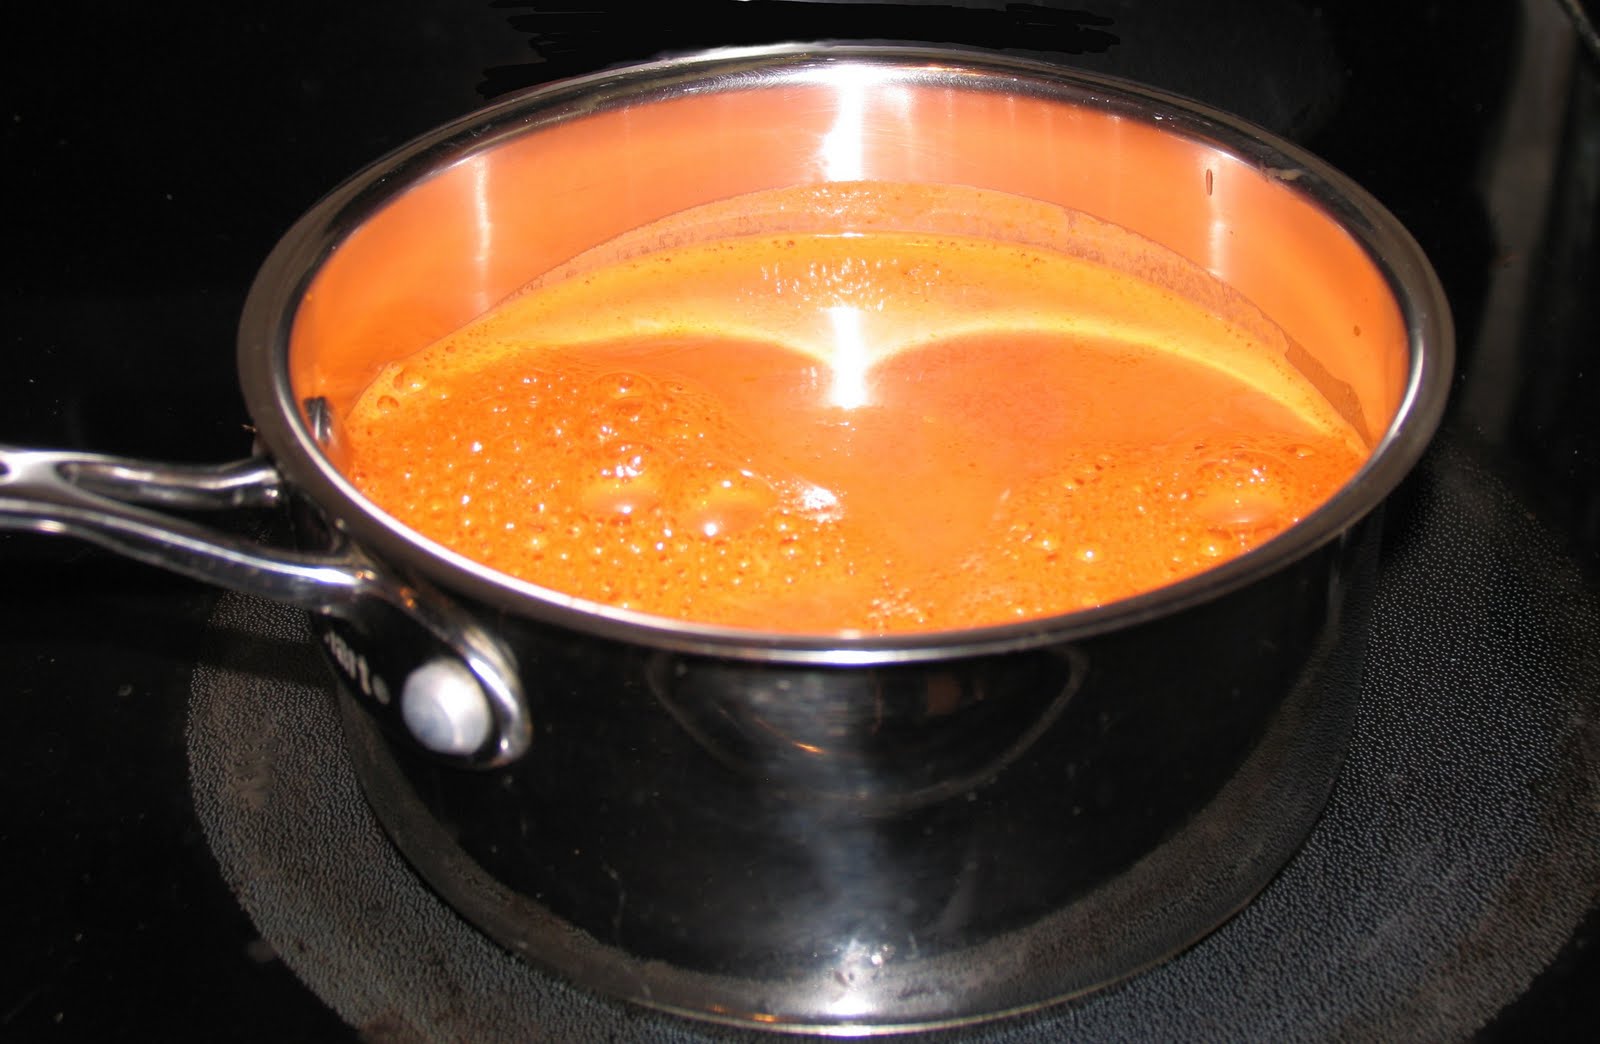
You can use 100% pure carrot and apple juice from the grocery store if you do not have a juicer. Combine the juices in a sauce pan with the cinnamon and ginger. Increase the heat until it begins to bubble and maintain a slow bubble. This will boil over very easily, so it's important to keep it to a gentle simmer.


Once the carrots become a rich redish-orange and the cinnamon stick has begun to uncurl, heat some olive oil in a large sauce pan. When the oil is ready, add the cup of rice and stir to coat. Cook for about 2 minutes.

I have a strange sense of humor. Note the rich color of the carrot mixture.
Add the 1/3 cup of hard apple cider and cook while stirring until the rice has absorbed the cider (between 3-5 minutes).

Add the carrot and apple juice infused with ginger and cinnamon 1/2 a cup at a time, waiting for each 1/2 cup to be absorbed before adding the next.

Once the juice has been absorbed, add the Vanilla Hemp Milk, 1/2 a cup at a time.


The rice should be done. You want the rice to still be firm and have some shape to it without being the slightest bit crunchy. Serve in a bowl with a small drizzle of Maple Syrup. This is a beautiful risotto with a distinctively autumn flair.

Saturday, November 20, 2010

Vegan Mofo Day 20: Pumpkin Quinoa Muffins

Today, Lance and I went to the farmers market in the University District of Seattle. I was really impressed and happy to see pickles to try and a booth dedicated to fermented foods. I would have done my little happy dance if it weren't so darn cold - handling cash without gloves in freezing temperatures equals shivering and loss of one of the five senses. There is a really great representation of local farms with a wide array of seasonal produce. I bought a little something from nearly every local farm booth, and ended up with a nice collection of winter gourds. I anticipate that this will probably translate to another spike in gourd recipes to match my pumpkin streak in October.


I have had some oven roasted pumpkin waiting in my fridge to make its way into a pie or other baked good for a few days. I have been giving Annie a little with her food, so there wasn't enough for a full pie. We had to really watch her after Halloween. If someone had smashed a pumpkin somewhere, she would run straight for it and try to eat it quickly - which isn't bad unless it had been sitting on someone's porch for a while molding.

Annie has a fondness for all things orange

These muffins are really hearty and nutritious. Traditional baking pumpkins have a high amount of vitamin A, fiber, carbohydrates, and sugars. Jack-o-lantern pumpkins do not have the same concentration of nutrients, are much more fibrous, and offer less flesh to use in cooking. I highly recommend using baby sugar pumpkins or other smaller cooking gourds.

I know I have touted the health benefits of quinoa before, but in reading Healing with Whole Foods* (which I highly, highly recommend for anyone with an interest in what a tremendous impact foods have on us) I have discovered even more reasons to love it! It's higher in calcium than milk and has the magnesium and lysine needed to absorb it without having to "fortify" the product. When combined with a grain with a low lysine level, it has a more complete amino acid/protein factor than animal flesh or any other animal products. It's rich in iron, B vitamins, and vitamin E.

*Note on Healing with Whole Foods: It is not a vegan book, although it does acknowledge our society's "obsession" with protein consumption and promotes a plant based diet.


Pumpkin Quinoa Muffins
1 1/2 c. Pumpkin
1 c. Water
1/2 c. Maple Syrup (or Date Syrup)
1 scant c. Quinoa Flour
1 1/2 TB ground Chia Seed
1 1/2 c. Brown Rice Flour
3 T Tapioca Flour
1 tsp Baking Soda
1 tsp Cinnamon
1/4 tsp or less Ginger
1/2 tsp Salt
1/2 c. Raisins (optional)
1/3 c. rough chopped Pecans (optional)
1 tsp Apple Cider Vinegar
2 TB Olive Oil

Preheat the oven to 350 degrees. Combine the dry ingredients (flours, chia seed, baking soda, spices, salt) with a whisk in a large mixing bowl. Put the cooked pumpkin, water, and maple syrup in a food processor for about 2 minutes or until smooth. Combine the dry and wet ingredients and add in the raisins, pecans, olive oil, and apple cider vinegar. Pour amounts into a muffin tin and bake for about 25-30 minutes.


For more tips on preparing pumpkin, click here.

For money saving tips on grinding your own Quinoa Flour, click here.

Tuesday, November 16, 2010

Vegan MoFo Day 16: Quinoa Banana Muffins


A little planning ahead can go a long way in an allergy household. I try to make muffins every weekend as an easy breakfast for Lance and I as we are heading to work. These muffins are higher in protein than some of my other recipes, and they taste great. Some gluten free recipes dry out rather quickly, but these are still moist and flavorful after 48 hours.

Quinoa Banana Muffins
3 ripe Bananas
1 c. Water
1 vanilla bean, scraped
1/4 c. Maple Syrup
1 scant c. Quinoa Flour**
1 1/2 Tb Chia Seeds, ground*
1 1/2 c. Brown Rice Flour
3 Tb Tapioca Flour
1 tsp Baking Soda
1/2 tsp Salt
1 tsp Coconut Vinegar
2 Tb Olive Oil


Preheat the oven to 375 degrees F. Blend the bananas, water, maple syrup, and vanilla in a blender until smooth and combined. Combine the dry ingredients in a bowl with a whisk and then slowly stir in the banana mixture. Add the olive oil and coconut vinegar right before you pour the batter into a muffin tin.

*I grind the Chia seeds in a coffee grinder. Chia seeds are a fantastic source of omega fatty acids, so I try to use them in smoothies, cereals, and cooking. They act a little like flax and help bind the muffin together. I recommend grinding a neutral tasting grain in the coffee grinder after grinding Chia seeds. Chia seeds leave an oily residue that doesn't taste very pleasant with some flavors.

** I grind bulk sale quinoa grain in my coffee grinder to save on cost. It's far cheaper than buying the flour.

Opened a day later, they still retain moisture and texture

Saturday, November 6, 2010

Vegan Mofo Day 6: Quinoa Kale Salad and Sprouting

I had high aspirations for today's culinary creations. I was going to make soy free swimming rama and some cupcakes, but plans change. My family invited us over a day early to celebrate my husband's birthday. They are all omnivores, but they are pretty respectful of my dietary restrictions and choices and give me free reign of their kitchen. I brought beans, quinoa, cilantro, a pomegranate, and a few other ingredients and made Pomegranate Guacamole and a Quinoa Kale Salad. I eat and share my food, and they eat what my family has prepared as well. My brother wasn't sure about the guacamole, but, like everyone else who has doubted the powers of pom-guac, he claimed it addictive and polished off the bowl.


Quinoa Kale Salad
serves 2-3 people as a main course, or a whole family as a side
2 cups cooked Quinoa
1 bunch curly leafed kale
1/2 cup chopped onion
3 cloves garlic
2 Tb olive oil
1 can Pinto or "Butter" beans
1 cucumber, cubed
1/4 cup cilantro
1/2 a lemon, juiced
salt and pepper to taste

Coat a large pan with olive oil and cook the garlic and onions for about a minute. Add the kale and beans. The kale is done when it turns a brilliant green. When the kale is half cooked, add the cilantro, salt and pepper. Pour the quinoa and cucumber over the top when the kale is done, give it a quick stir, and serve.

I use Eden Organics canned beans because the can liner does not have BPAs. Making your own beans can be time consuming with a lot of soaking and rinsing. Sometimes it's just easier to use canned over dried.

People who get bored with plain quinoa enjoy this dish and it is a hearty side. Quinoa is a fantastic pseudocereal, meaning it is not in the grass family or a grain at all. Quinoa is a seed and a balanced source of all of the essential amino acids humans need. Rice and wheat do not have this attribute. Quinoa is very high in protein - about 15% is protein of its weight - and a 1/4 cup of quinoa has the same protein content as one chicken egg without risking salmonella. I won't go into ethics, but let's just call it the happier protein source.

SproutingSprouting is a great way to get a little extra nutrients out of grains, seeds, and legumes. There are machines that rinse the sprouts throughout the day while you are at work, but I prefer to use mason jars. I just don't like introducing plastic into my food.

Sprouting is always started by soaking the grains or seeds. This helps remove the enzyme inhibitors. Enzyme inhibitors are present on grains, legumes, and seeds to prevent the seed from sprouting and attempting to grow before the conditions are right. Removing these inhibitors makes it easier to break down the food to access nutrients and reduces gas by removing long chain saccharides (carbohydrates) that are on beans and aren't broken down in our system soon enough to prevent feeding bad bacteria in the colon. The saccharides are essentially sugars that feed bad bacteria like candida, and produce gas from fermentation (think of the yeast and air build leading to fermentation or alcohol in wine - the grapes provide the necessary sugar to feed the bacteria to move that process along).

Soaking: Hulled Buckwheat

For a chart on soak time for seeds, grains, and legumes, check out this link.

As a general rule, I soak most legumes and seeds over night. Buckwheat I only soak for 3-5 hours, rinsing and replacing the soak water at least once. Cover your soaking jar with a tea or dish towel to prevent light from getting to the seeds.


After my soak time has passed, I rinse the seeds and jar thoroughly, put the seeds back in the jar, and put cheese cloth or mesh over the top, secured with a rubber band. I've found that the plastic mesh bags that are used in the grocery store for selling bulk garlic or lemons works really well as a mesh jar top.

The jar on the far left is covered with cheesecloth and a rubber band
The rest are covered with reused bulk sale lemon bags cut into smaller squares
Tilt the jars at a 45 degree angle with the mouth of the jar facing towards the ground in a bowl. Remember to cover the jars with a tea or dish towel.

This is how the jars should be set so water can drain out to discourage bad bacteria
growth. Right after this photo, the jars were covered with a clean dish towel.
Rinse sprouting seeds at a minimum of twice a day - three to four times being ideal. I usually rinse my seeds before work, when I get home, and then right before bed. Most seeds only need to sprout to a quarter of the length of the seed before they are done. The exceptions are broccoli, radish, mung bean, clover, and alfalfa. I soak buckwheat during the evening and set it to sprout overnight. I rinse in the morning and usually by the time I get home from work that day they are ready to harvest.

Once your seeds have finished sprouting, rinse them very well. I use some food grade hydrogen peroxide and rinse them again before either dehydrating them or storing them to use fresh. Sprouted buckwheat is delicious dehydrated. I spread the seeds over a teflex sheet and put a mesh dehydrator sheet over the top so the seeds don't go flying around my dehydrator. I set the temperature to 105 and dehydrate the "buckwheaties" overnight.

Buckwheaties with Vanilla Hemp Milk and bananas

You don't need a dehydrator to enjoy sprouts. Peas, lentils, clover, radish, and broccoli are all sprouts I store in the fridge to use fresh. I rinse fresh sprouts at least once a day. Even in the fridge they are still growing and shedding toxins/inhibitors. Broccoli sprouts tend to mold on me easily, so I don't sprout them long and I definitely use hydrogen peroxide.

I do recommend a dehydrator though. I'm not going to claim that mine is on all the time, but even on a mid-high raw vegan diet I use it quite a bit for sprouts, raw vegan crackers, and to dehydrate fruits and veggie chips. I have a 9 tray Excalibur, but would probably get by just fine with a 5 tray model.

Sunday, October 31, 2010

Buckwheat Crepes with Potato Mushroom Filling

What is Buckwheat?

When I first started realizing that I had a problem with gluten, I was pretty ignorant about how many ingredients were out there that I could still use. I didn't really know how to cook, so most of my foods came out of a package and were usually exclusively rice. Any time I saw buckwheat on a label, I put it aside assuming it was just another name for wheat and had gluten. As I got bored with the same old foods, I started doing more research and was happy to find out that buckwheat isn't remotely similar to wheat and most certainly does not have gluten. Wheat is in the grass/cereal family whereas buckwheat is in the Polygonaceae family or "smartweed" family and is referred to as a pseudocereal to emphasize that it is not related to wheat. The part of the plant used is not a grain; the groat is actually a fruit.

If you soak buckwheat, it will become slimy. This characteristic makes it useful in cooking because that actually helps as a binder. To me, buckwheat has a very distinctive flavor that I can only tolerate in moderation. My favorite way to enjoy buckwheat is sprouted and dehydrated. Raw sprouted buckwheat has a much milder flavor than buckwheat flour used in cooking. Baked or cooked buckwheat is something I usually pair with stronger flavors.


Buckwheat Crepes
makes about 10 7-8" crepes
1 1/2 c buckwheat flour
1/4 c sorghum flour
1/2 c potato starch
1/2 tsp salt
1 tsp baking soda
1/3 c olive oil
2 1/2 c water
2 Tb agave

Combine the dry ingredients in a large bowl. Combine the wet ingredients in another bowl and quickly combine the wet and dry together.


Preheat a seasoned pan over medium heat. I run a little bit of coconut, grapeseed, or peanut oil on a paper towel over the cooking surface.


After the pan is heated, put 1/2 a teaspoon of coconut oil in the pan and swirl the pan to coat before ladling in the batter. I use a ladle large enough to put the right amount of batter in the pan at once. Then rotate the pan to spread the batter out thinly. For more tips on cooking crepes, click here.

One the batter bubbles and starts to firm up at the edges, work your spatula under the crepe and flip. Once the crepe is done, I transfer it to a cooling plate, and then to a stack of crepes with wax paper dividing them once cooled. These can be made the day before and refrigerate well.


Potato Mushroom Filling
Fills 5 crepes
2 red potatoes, diced
3 "cloves" shallots, chopped
3 cloves of garlic, minced
2 Tb fresh oregano, finely minced
1 1/2 Tb fresh chives, finely minced
1 1/2 cups chopped mushrooms
salt and pepper to taste
olive oil

Preheat the pan over medium heat. Add enough olive oil to coat the bottom of the pan. Once the oil is ready (will very slightly ripple because of the heat), add the garlic and shallots. Cook for one minute. Add potatoes and herbs. Do not stir often to let the potatoes crisp up a bit before turning them. If you stir before the potatoes crisp, you will end up with soggy, soft potatoes. Once the potatoes are nearly done cooking, add the mushrooms, salt, and pepper.

I cook these two components at the same time because the potatoes don't require much fuss.

Thursday, October 14, 2010

Vanilla Hemp Milk


Hemp is a wonderful food, packed full of essential fatty acids and protein. I've used it to supplement protein intake and as an EFA supplement to aid with arthritis and digestive health. It's a fantastic, humane, and environmentally responsible alternative to animal milks. It's becoming so popular that I can find hemp protein supplements, hemp oil, hemp ice cream, hemp milk, and hemp seed in grocery stores that are part of nation-wide chains (QFC, Safeway, etc.). I have found some medical articles suggestion that consumption can lead to a false positive on very sensitive drug tests (articles suggested waiting 6 days after seed consumption and 48 hours after oil consumption), although the food is perfectly safe and legal, and will not make you giddy, lazy, or high. Hemp is in the cannabis family, but the amount of THC is negligible (typically 0.3% compared to marijuana's 6-20%).

The hemp milks I have found in the supermarket are tasty, but have a lot of additives that really aren't necessary. I don't care for carageenan (a processed seaweed used for texture) or brown rice syrup. I buy hemp seeds from rawvegansource.com in bulk and freeze or refrigerate what I am not using immediately. The oils make the food more prone to going rancid.

Hemp Milk
yields appx. 8 cups
3/4 cup hulled hemp seeds
2 vanilla beans, scraped
1/4 cup agave (or more depending on your taste)
pinch of milk
7 cups of water

Put the hemp seeds, vanilla, agave, and 1 cup of water in a high speed blender. Blend until smooth. Taste the mixture to see if you need more agave. I like the nutty taste of hemp, but some people want to mask the flavor. After the ingredients are combined, pour in the rest of the water and blend until combined.
Stored hemp milk after a shake - some sediment rests on the bottom

I don't have to strain the mixture because my Vitamix does a great job of breaking things down and I don't mind the small amount of sediment that forms in the bottom of my storage container. If you don't have a high powered blender, you will want to strain the mixture through a cheese cloth. This will keep in the fridge in an air tight container for 3-4 days. I've used the milk in amaranth porridge, baking, risotto style grains, and cereal.
hemp milk over sprouted buckwheat and bananas
Breakfast of Champions

Monday, October 11, 2010

Pumpkin Sticky Buns


I set out this morning to bake cinnamon rolls, but thought these were more suited to a "caramel" topping. Caramel is a combination of sugar and cream, but I replaced those with dates and vanilla. I made mini-rolls because I didn't have large surface ready for the whole batch of dough, so I split it into two. Bonus: I feel less guilty when I eat a lot of them :)

Cinnamon Roll Dough
1/2 cup teff flour
1 cup brown rice flour
1/2 cup tapioca flour
1/2 tsp salt
1 tsp baking soda
1 & 1/4 cup pumpkin
4 tb palm oil, melted
1/4 cup agave

Combine the dry ingredients first, and then mash the pumpkin in with a fork. Combine the melted oil and agave first, then transfer onto the batter and combine. If the dough is sticky and hard to handle, it's too warm. I had to let it rest in the fridge for about 30 minutes. Flour a surface and lightly roll out the dough. It will stand up to rolling, which is fairly rare for a vegan gluten free dough.

Once you have rolled the dough into a rectangular shape, soften 2 TB of palm oil and mix in 3 TB of maple syrup to brush over the dough. I made the mistake of completely melting the palm oil, and ended up with a gooey mess, which you'll see below. Delicious, but gooey. A nice addition would be rough chopped pecans. Sprinkle a liberal amount of cinnamon on the dough, a small amount of allspice (just a pinch), and grate some fresh nutmeg on top. Note: Not all maple syrup is actually vegan, so it's best to research your sources. Sometimes they use fat to keep the syrup from bubbling over. If you would rather, you can use turbinado sugar, which to the best of my knowledge and research is never filtered with bone-char.


Roll the dough along the length of the dough (roll long end to long end - don't start at a skinny end, or you'll end up with the fattest cinnamon rolls ever) and cut them about at a length of about 1 1/2 inches. The second mistake I made while making these is not putting baking paper on the cookie sheet. These are gooey, and while cleanup wasn't impossible, it was a little longer than it could have been. The baking paper I use sparingly is unbleached and I reuse often before composting. It's a great way to keep things a little fresher than just sitting in the open.

These buns look a little dry on the outside when they are done (after about 25 minutes at 350 degrees F), but they are quite moist in the middle. They are so yummy.

"Caramel"
4 dates, soaked for a minimum of 45 minutes
3-4 TB of water
pinch of scraped vanilla bean
small pinch of salt

Blend the ingredients in a high speed blender and spoon over the top.

Sunday, October 10, 2010

Teff & Sweet Potato Donuts

I think my new favorite ingredient is teff. I hadn't worked with it much, but recently I have been using it to convert some recipes, and I really like the texture and molasses undertones it lends to recipes. Some people consider it sour and it has a strong taste, so I tend to use it as a one-fourth of the flour volume or less. It creates a beautiful dark brown color, and retains moisture really well if you combine things properly. Like most gluten free banana breads, it seemed to settle down and hold much better as day old, although it was delicious as a melty crumble the day of.

Chocolate Banana Tease Bread - note the rich color

Like quinoa, teff has all 8 of the essential amino acids, which would be considered a complete protein. It is very high in fiber, iron, and calcium. It was almost exclusively grown in Ethiopia, but it is catching on in popularity. There is a farm that grows quite a bit in Idaho, so it's fairly easy to find in the Seattle area.

Teff is considered a gluten free grain, but it does contain a form of gluten. It just doesn't have the chain considered to activate celiac/gluten intolerance in people. Both my husband and I seem to do fairly well with it. If it does have gluten, it's not enough. I tried to make a soda bread with it recently, and it was not pliable at all and turned into a powdered mess. Trial and error seems to be my cooking method of choice, and not everything is a home run.

Yesterday, my mom and grandparents came over for a nice big dinner. I have been sick lately and was getting cabin fever, so I was glad they all came over. We had plenty of vegan sides to go with their meat (I stuck to the sides). I had my pea salad with macadamia dressing, lightly blanched broccoli, sweet potatoes, and a nice vegan pumpkin pie with coconut ice cream. It was a very filling dinner. Surprisingly, I actually showed some restraint this time and didn't cook enough for an army, so leftovers were limited. I had about a cup and a quarter of sweet potatoes left over and wasn't sure what to do with them. I've made sweet potato pancakes that are always a hit, but I wanted something different. I settled on pan fried doughnuts. It sounds very unhealthy, but we rarely have anything fried.

Sweet Potato Donuts

1/2 cup teff flour
1 cup brown rice flour
1/2 cup tapioca flour
1 1/4 cup sweet potato (cooked and mashed)
1/2 tsp kosher salt
1 tsp baking soda
1/4 tsp fresh grated nutmeg
4 Tb melted palm oil (Spectrum Shortening is the brand I used)
1/4 cup water
1 tsp vinegar

Toppings:
powdered sugar (corn starch free)
or
granulated sugar and cinnamon

Combine all of the dry ingredients thoroughly with a whisk. Mash in the sweet potatoes with a fork or pastry cutter until it resembles pie dough (pea sized clumps). Melt the palm oil and combine that with the water and vinegar and then combine the wet ingredients with the dry ingredients.

My sweet potatoes were fresh out of the fridge, so it helped temper the palm oil. If everything you start with is at room temperature or warmer and the dough is hard to work with, stick it in the fridge for 30 minutes. You should be able to form a snake or length of dough with your hands really easily. Connect the ends of the dough to form a doughnut shape. I made mine really small because I was pan frying them instead of deep frying. I used peanut oil, but you can use whatever high temperature oil works best for you. Vegetable oil is usually soy and corn, and I am terribly allergic. If you are deep frying them, watch for them to get a nice dark golden color. If you are pan frying, just cook them a few minutes on each side, and be careful to only flip them once. You should notice the side start to turn a golden color before flipping them.


Once they were done cooking, I put them on a drying rack over a sheet pan with raised sides so the oil would drain off. If you put them on paper towels, you will end up with a mess. I didn't have much oil, so I flattened the rest of the batter and made naan bread for my dinner tonight (yum!). This is a versatile recipe, and I may find other uses or variations down the road.

I put 1/4 cup of turbinado sugar in the Vitamix blender and let it whir and ended up with some nice powdered sugar. I strained that over the top with a fine sieve. You could also roll them in granulated sugar with cinnamon while they are fresh out of the pan, but I prefer them with very little sugar for a hint of sweetness.